kernology - where laurie and learning meet
  • Home
  • Blog
  • Pictures
    • Art & Craft >
      • Temari
      • Yubinuki
      • Quilting
      • Weaving
      • Lapidary Work
      • Metal Work 2010
      • Metal Work 2009
      • Classes - 2010
      • Classes - 2009
    • Boots
    • Canyon Lake Gorge
    • Views of Texas
    • Views of Scotland
    • Travel >
      • Bunny Bravehart Road Trips
      • Scotland 2012
      • Maine 2011
      • New Mexico 2010
      • Scotland 2008
  • Oh, the places you will go!
  • Contact Laurie

Replacing Parts on the Loom

3/31/2019

1 Comment

 
The Loom Room, yes we have given what was the back bedroom a name, is still a bit of a mess but yesterday I started the loom upgrade. The parts I ordered from Macomber arrived earlier in the week so I decided to start on the loom this weekend. 

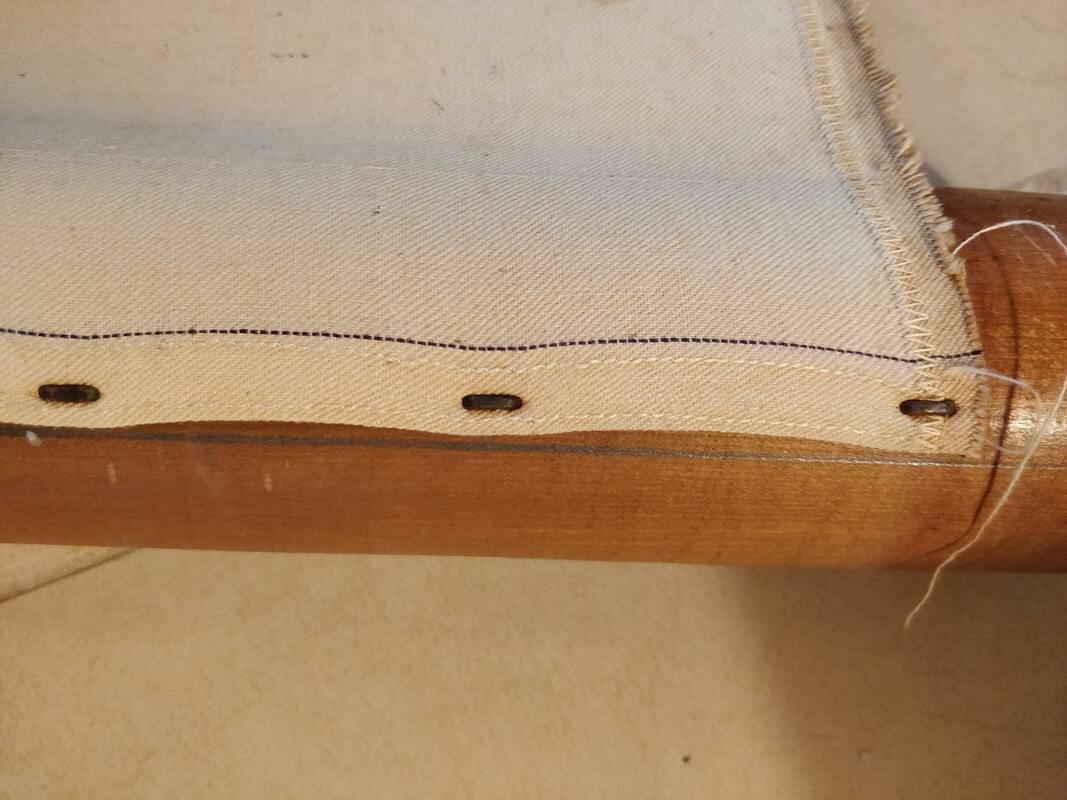
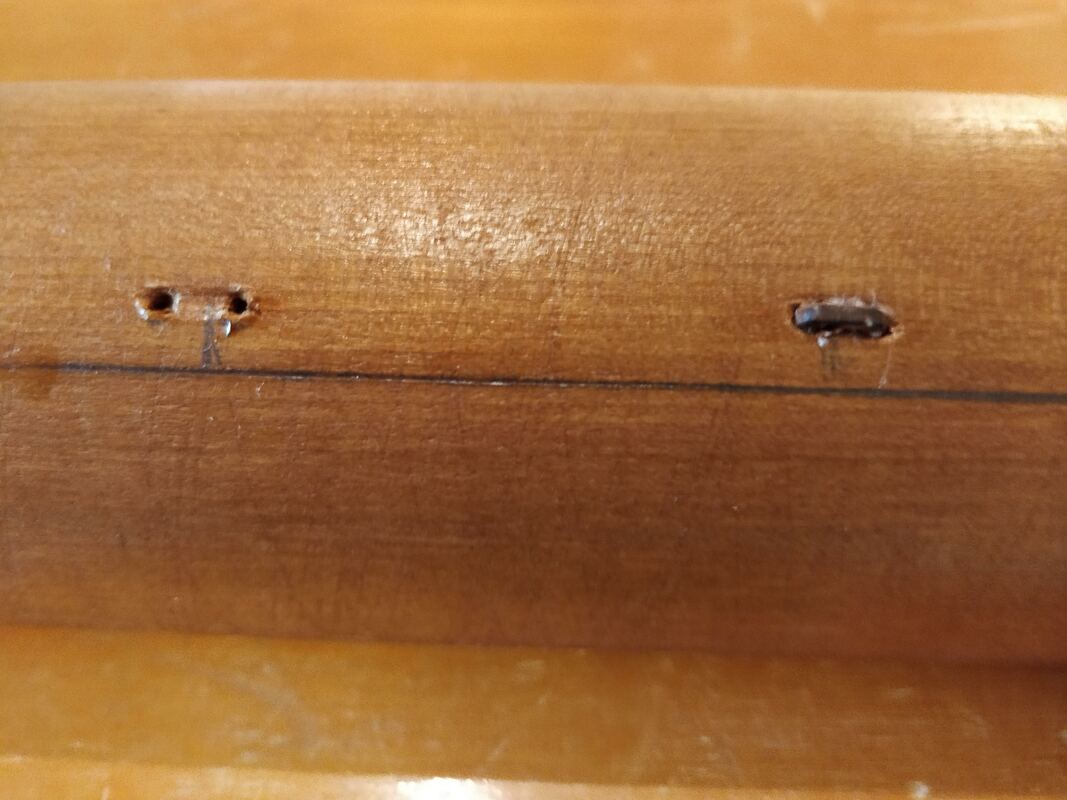
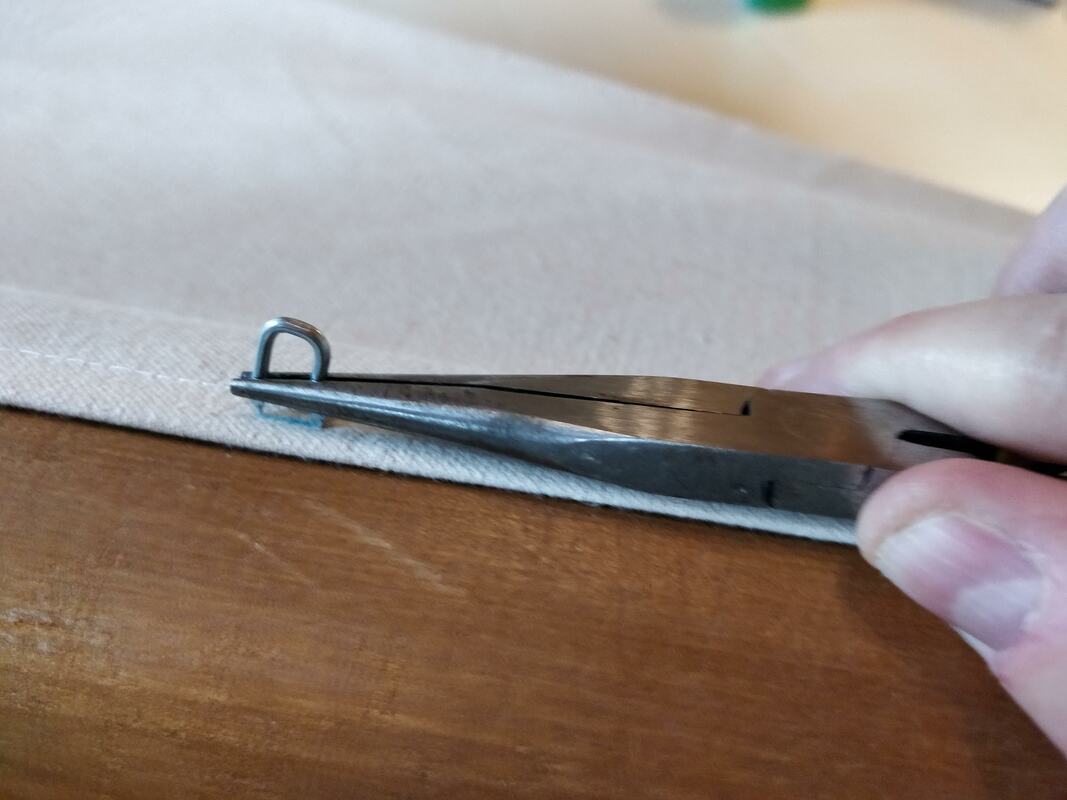
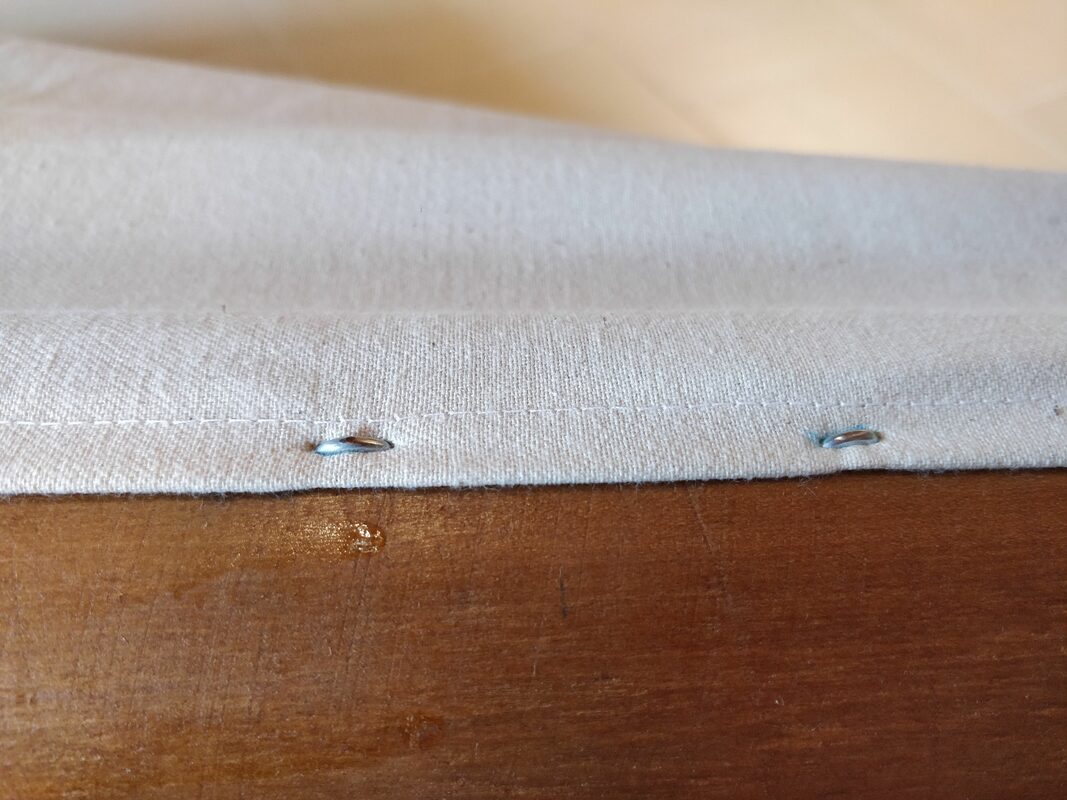
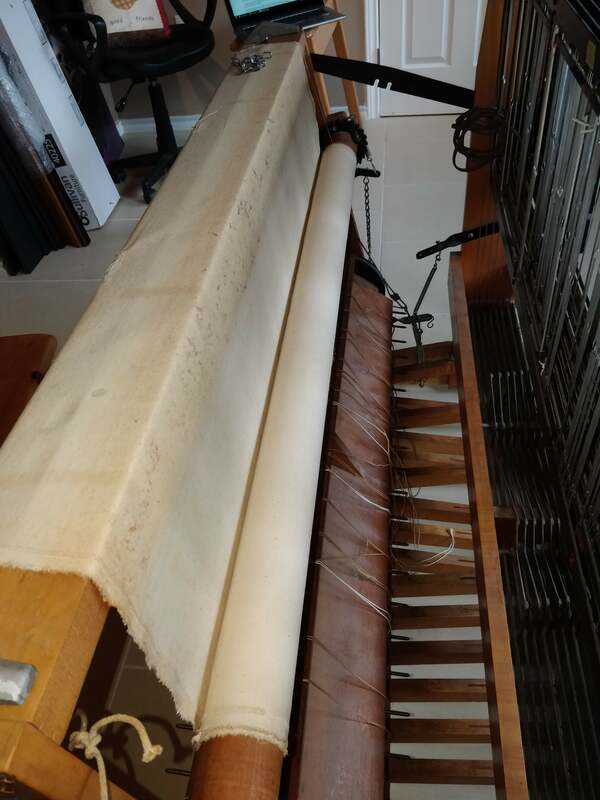
To start I replaced the aprons. This entails removing the old apron(s) and the staples that attach it to the beam. I used a set of pliers to grab onto the staple and to pull it out but in many cases it was impossible to get a grip on it so I actually ripped the apron off the beam; thus allowing a needle nose pliers to get under it and then I could push it up a bit until the regular pliers could grab it and remove it.

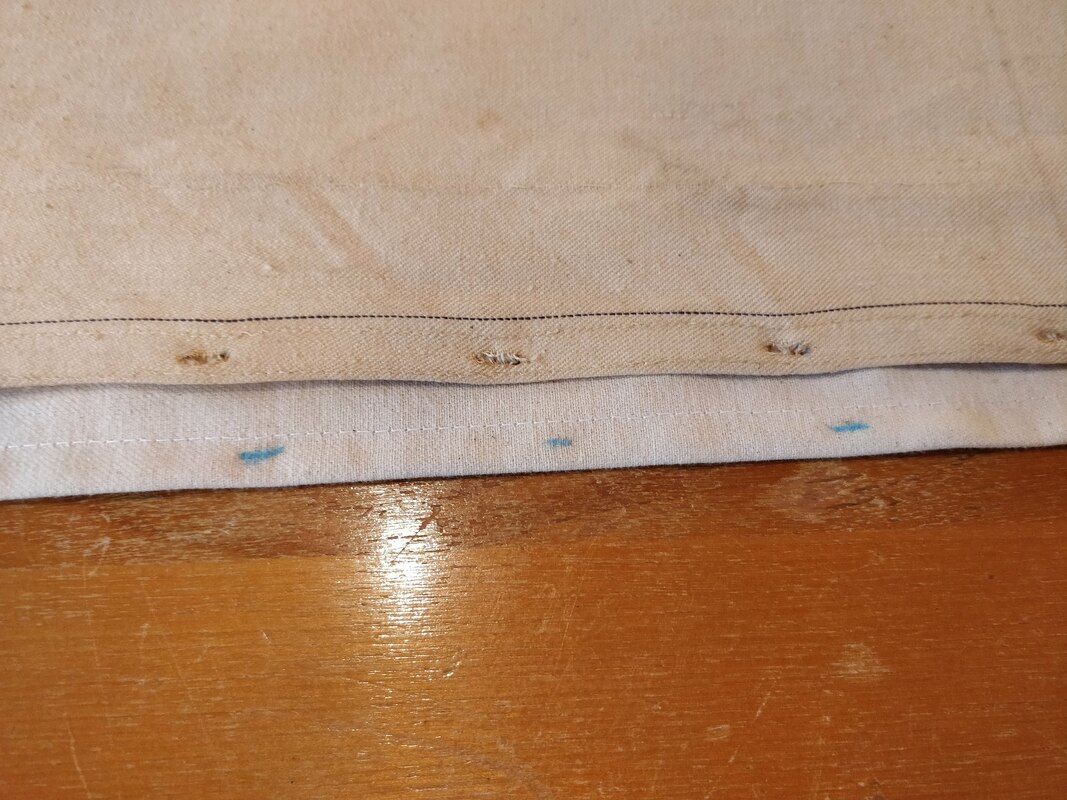
Then I placed the old apron on top of the new apron and using a colored pencil, I transferred the placement of the staple. Since the line of where the apron is was to be placed was still visible on the beam, I then put the first and last staple in using a hammer and needle nose pliers to hold the staple. Then I worked my way across the beam, driving in the staples into the existing holes. 
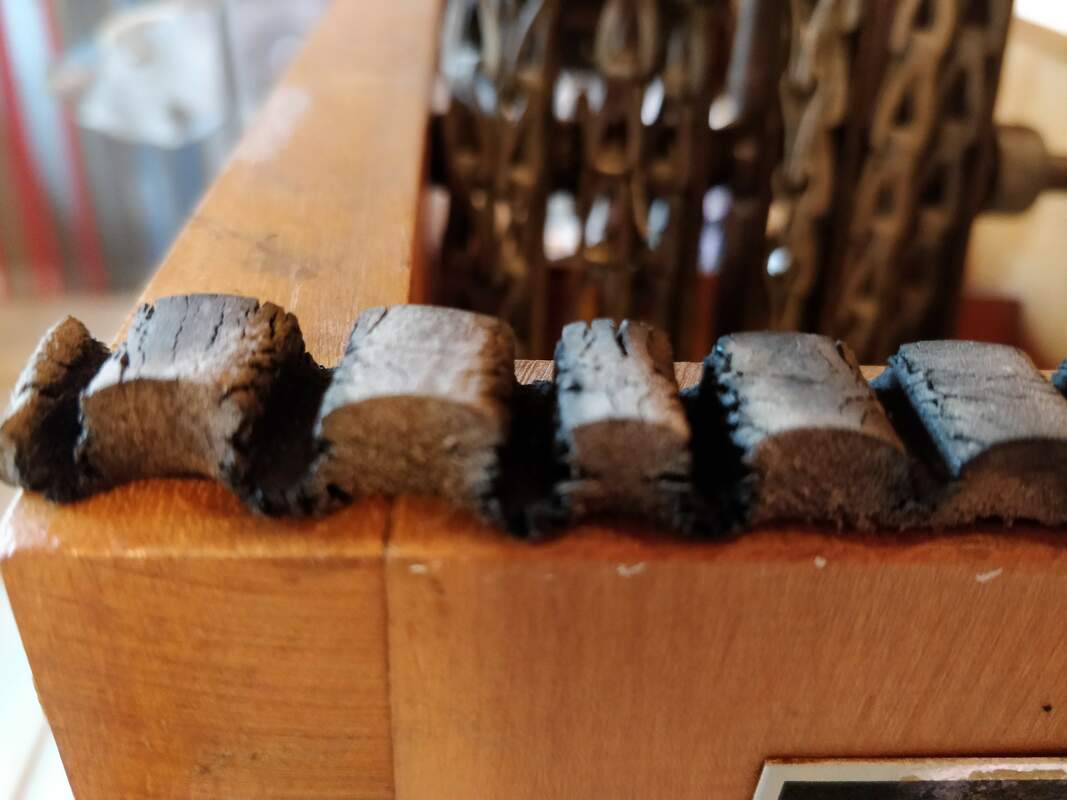
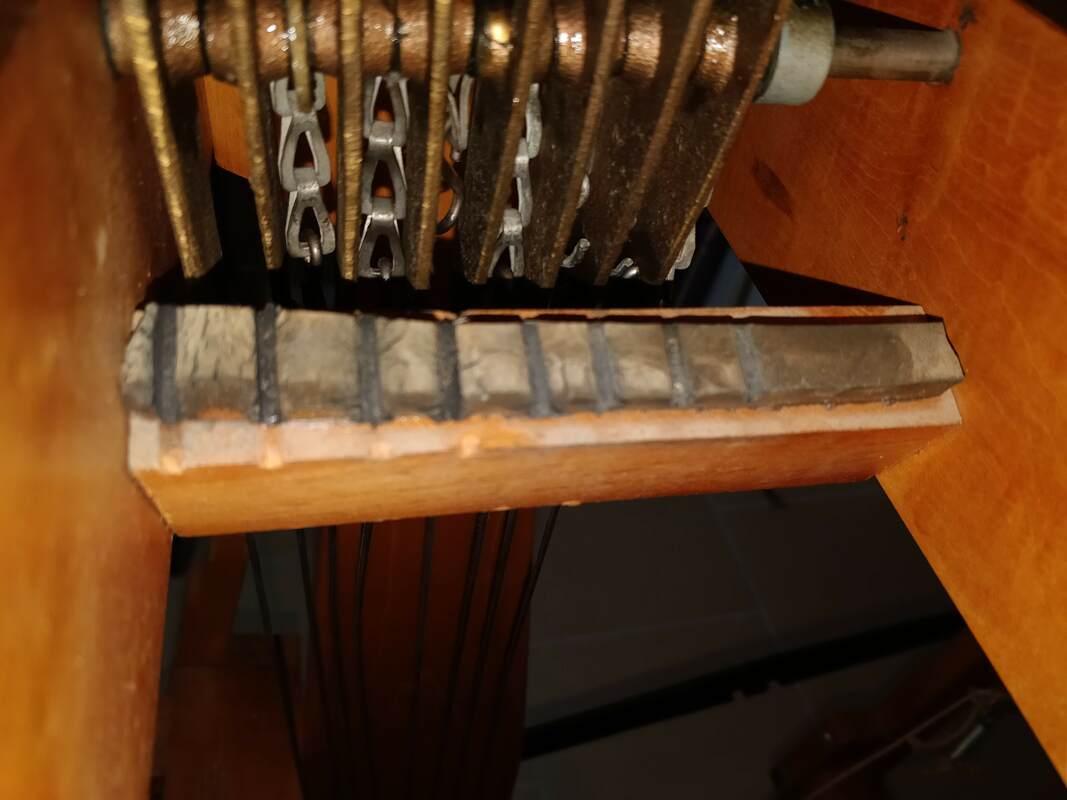
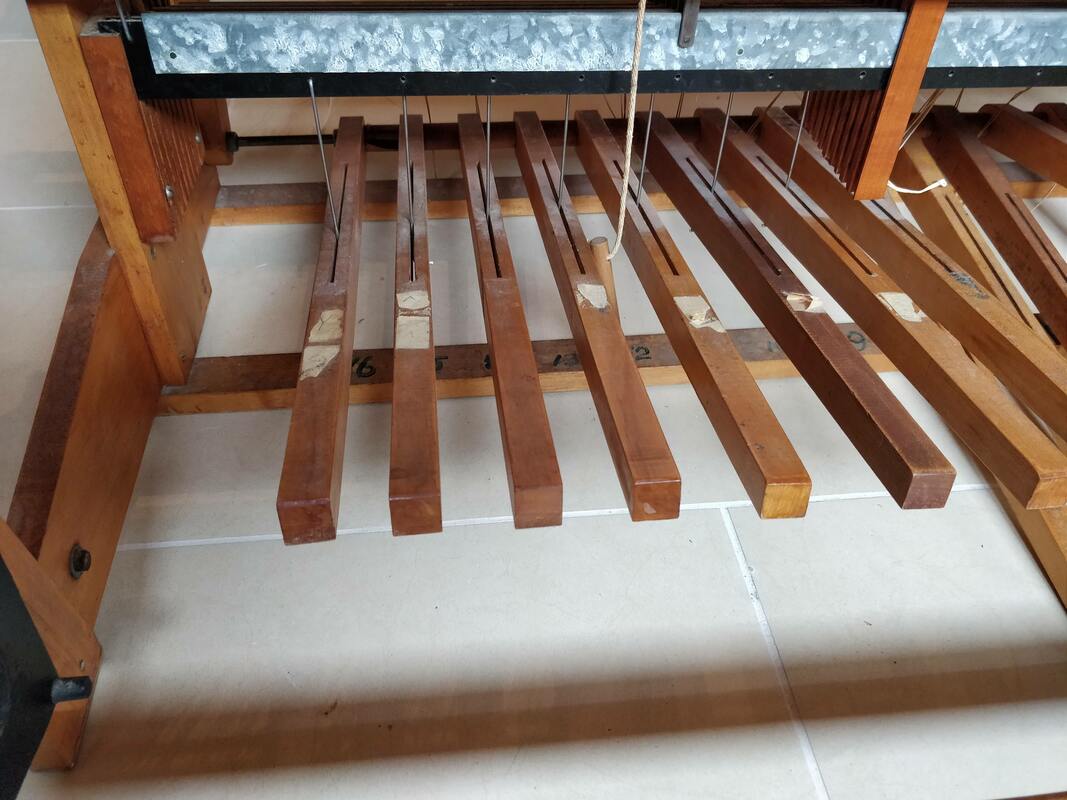
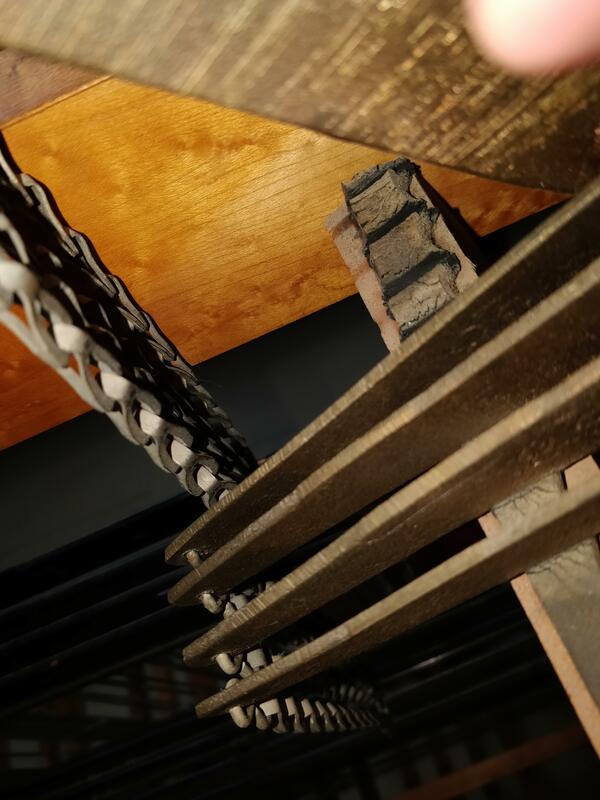
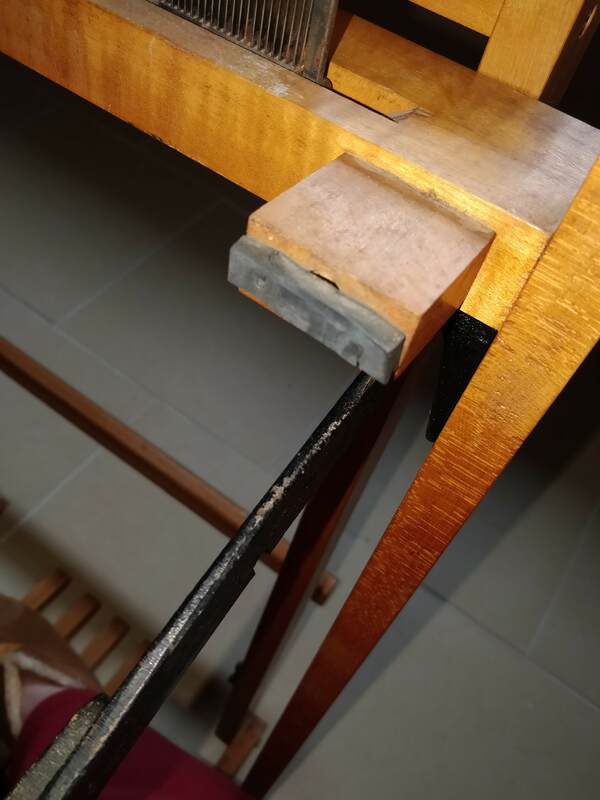
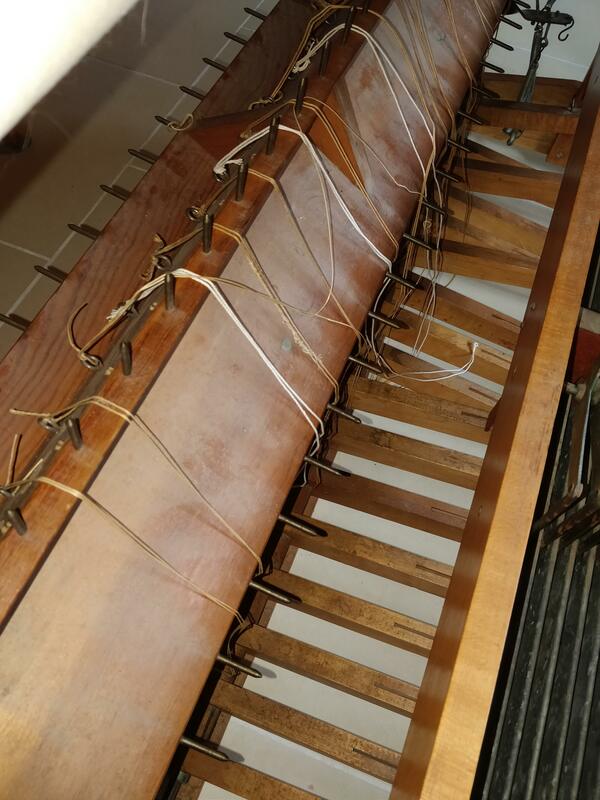
The next task was to replace the old, crumbly pad on the beater and under the jack levers.  The pads on the beater were held by tack nails and so they were easy to remove by just pulling them out. The pads under the jack levers were glued on and with just a slight tug they peeled off. Getting to these was also easy since I had removed the heddle frames so all the jack levers were in the up position. I just laid down a line of glue and placed the new ones where the old ones had been but due to the jack levers being up, I could not use them to apply pressure to hold the pads in position until the glue dried so I used painters tape to hold them down and prevent them from sliding.
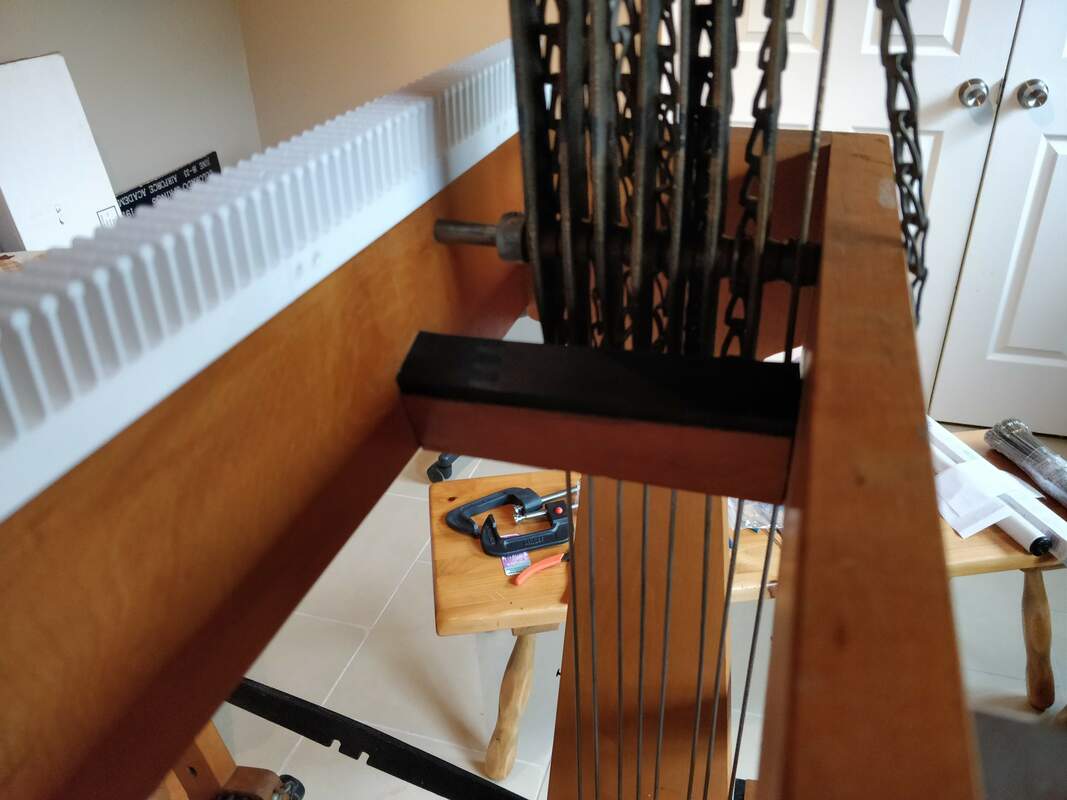
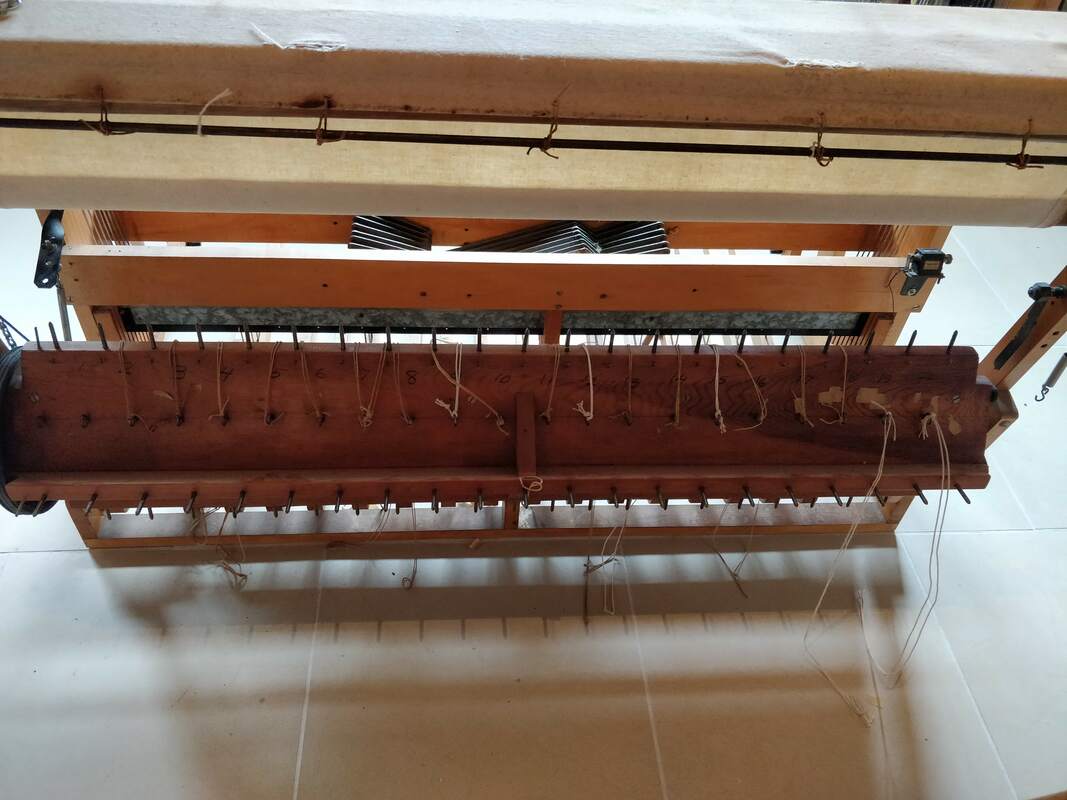
Next up was restringing the sectional beam. I put my raddle on the edge of the castle and then ran strings from each hook in a section up to the raddle and back to the hook and then tying it off. Afterwards I wrapped each string around the beam and hooked it on a post so they are tidy and not hanging loose.
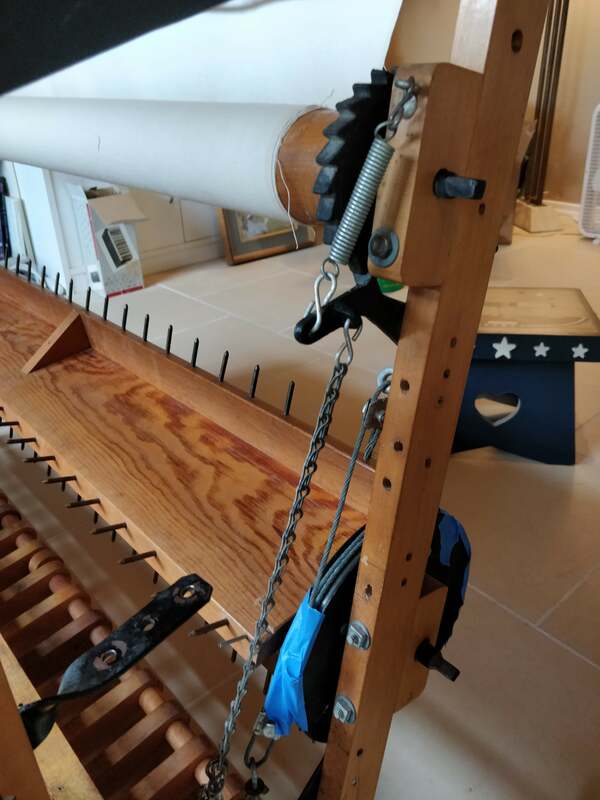
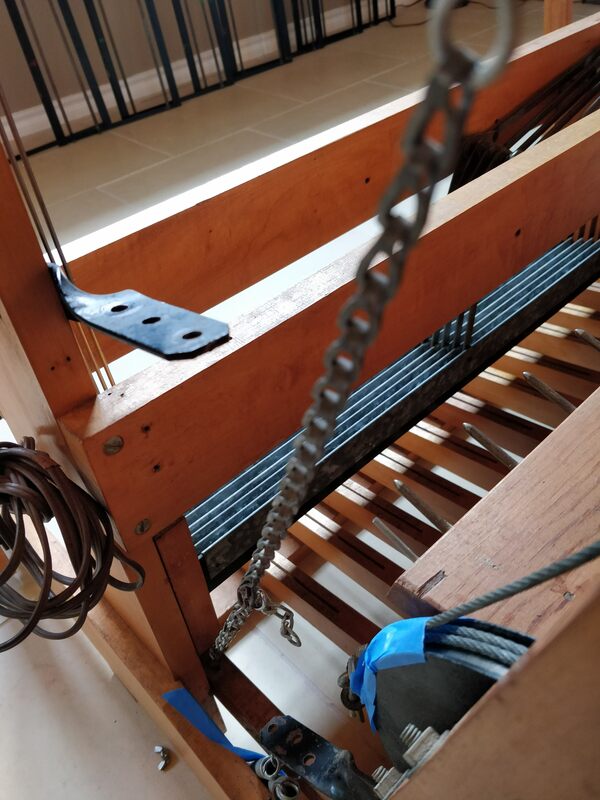
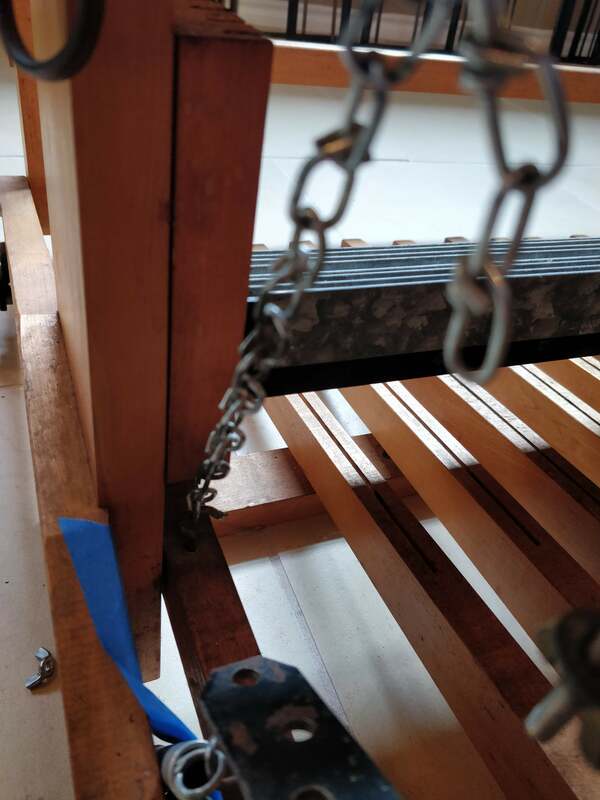
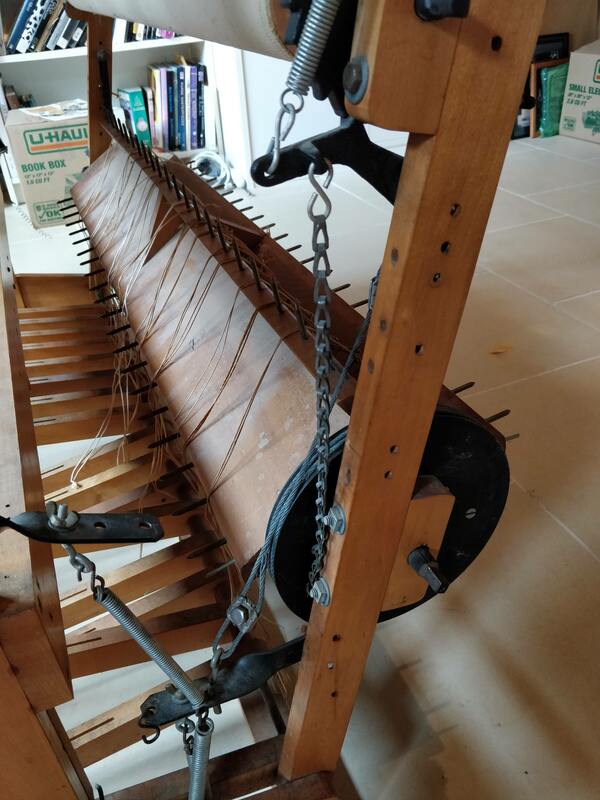
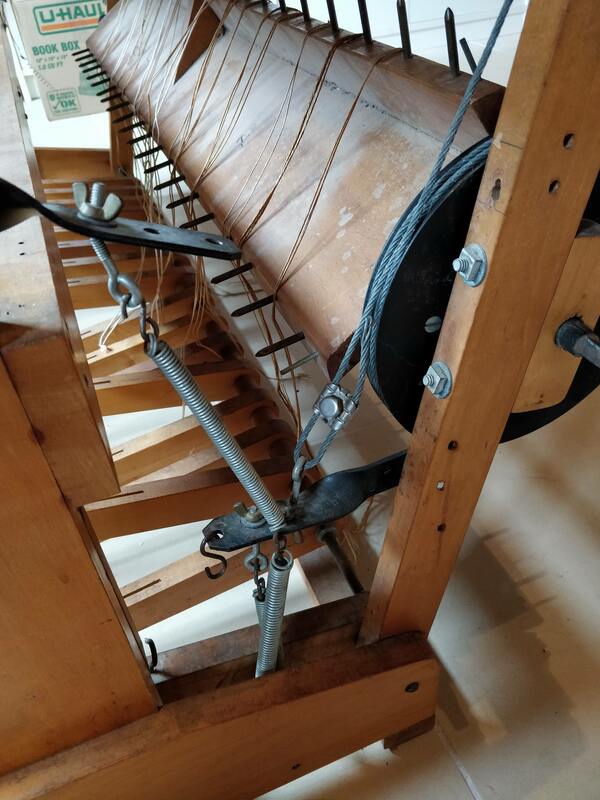
The last and frustrating bit was hooking up the brake system. The loom has 2 beams one regular and one sectional, the regular beam has a ratchet and pawl break and the sectional has a drum/friction break.  The sectional beam was hooked up to the release pedal when the loom was moved to the house but I could not get the beam to rotate when the release pedal was depressed AND some of the eye bolts were bent and it just looked like it had been put together to hold it and not to necessarily work.  I pulled out a diagram from a Macomber document of how to setup a second beam with a drum break and how my loom is configured does not match; in the diagram the drum break is on the top beam and mine is on the bottom.  I worked on this for over an hour and could not get a functioning configuration with the sectional beam and drum brake hooked to the release pedal. ​
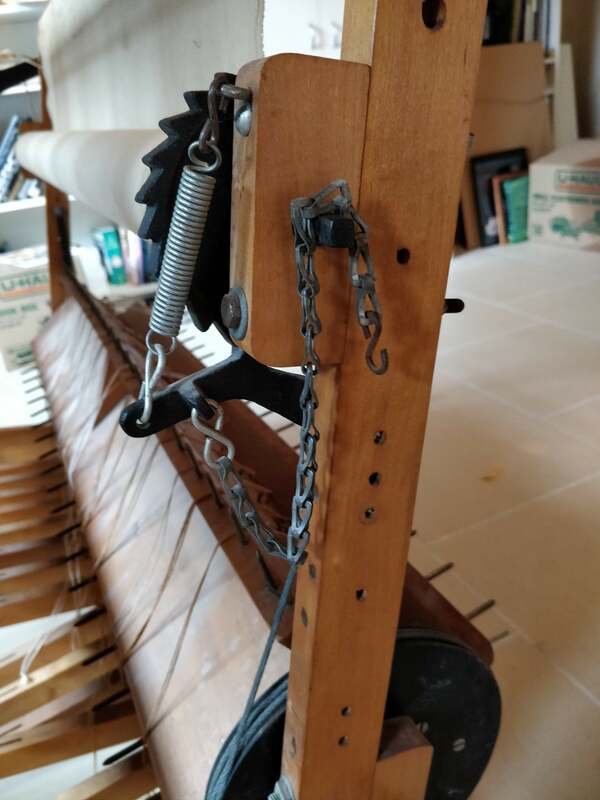
Then I decided to take the original pictures and I sent them to Macomber along with my questions about how do I get the drum break to work and do I need to move things around to accomplish this? I expect to hear from later next week.

In the mean time, I did work on hooking the regular beam to the release brake, and that works like a charm; there wasn't a chain long enough to do this so i used 2 small chains and a S hook in between.

Finally, using painters tape, taped the cable for the drum brake down so it isn't flopping around and I put the extra chains, eye bolts, wing nuts and springs in a bag until I can configure everything properly
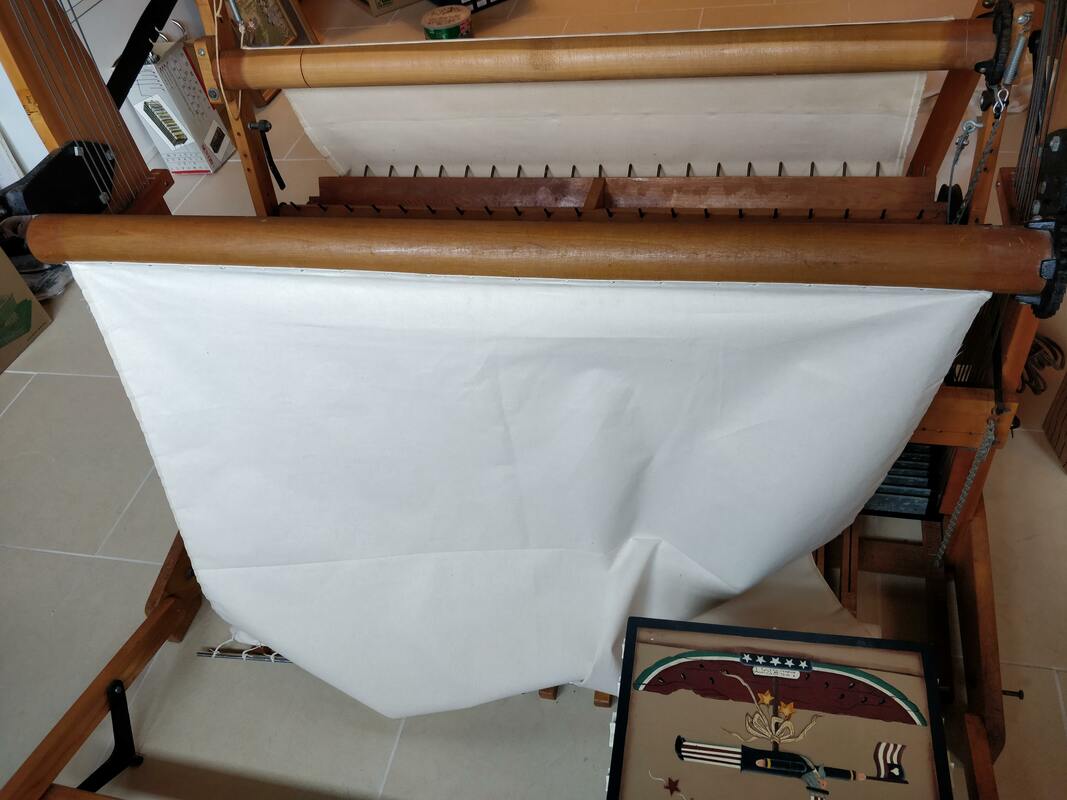
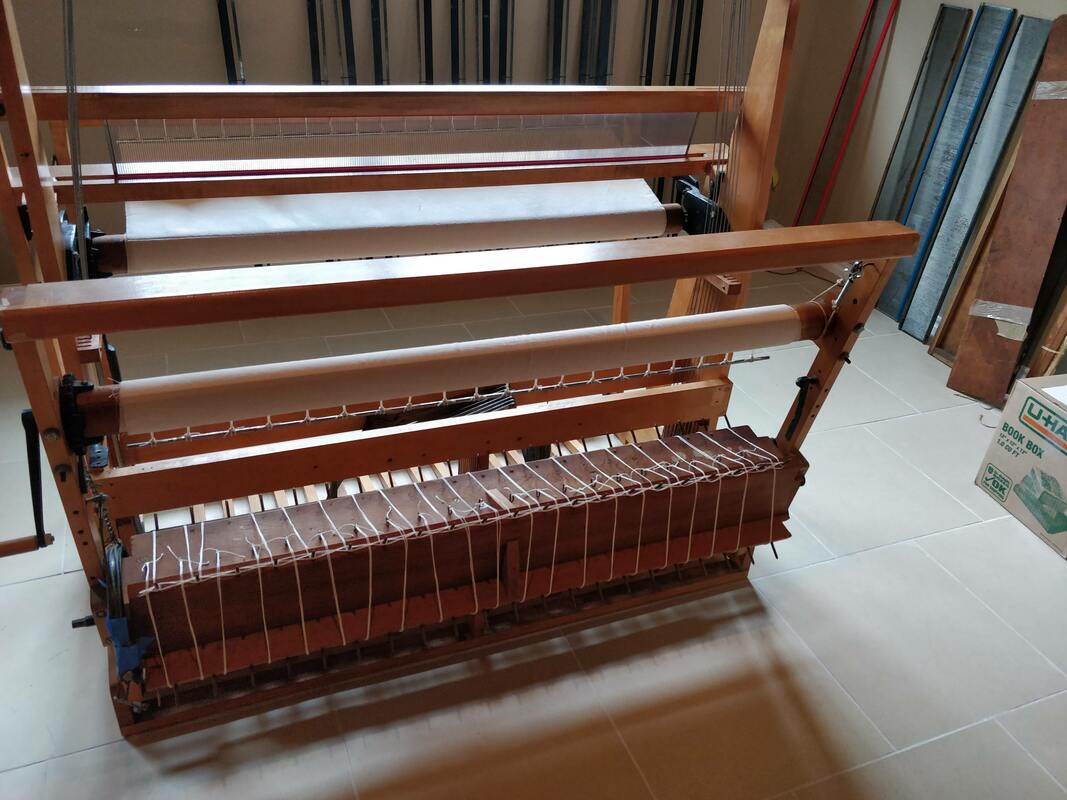
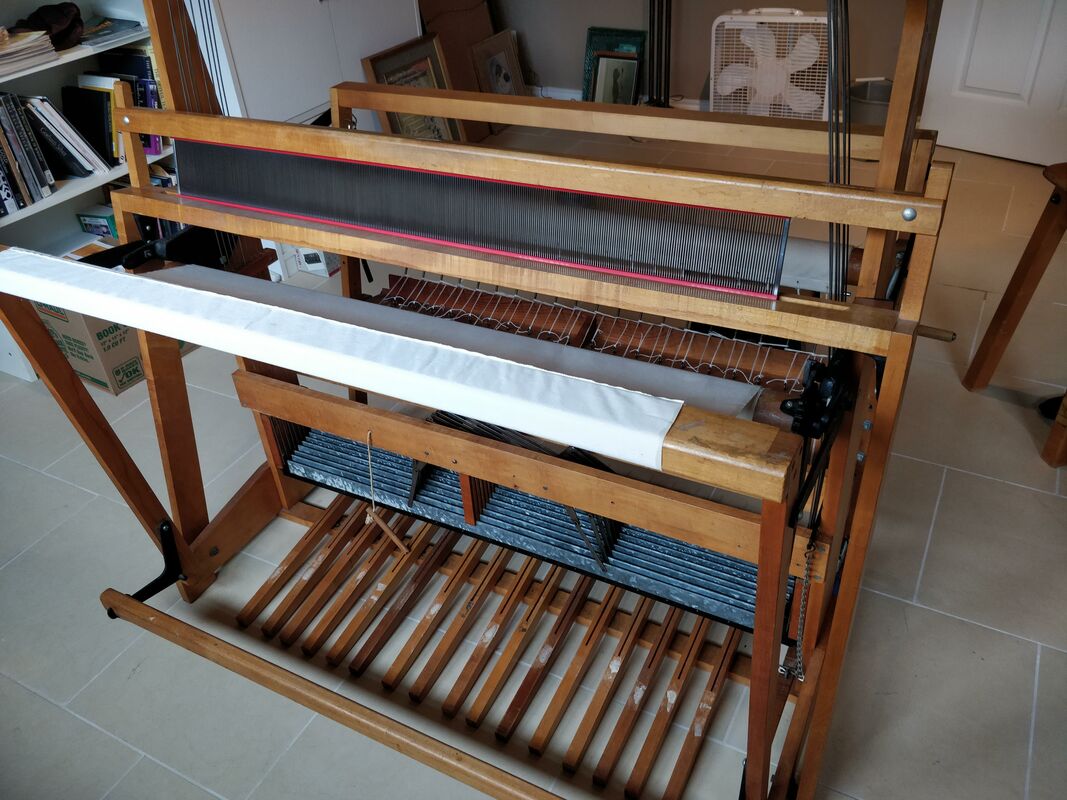
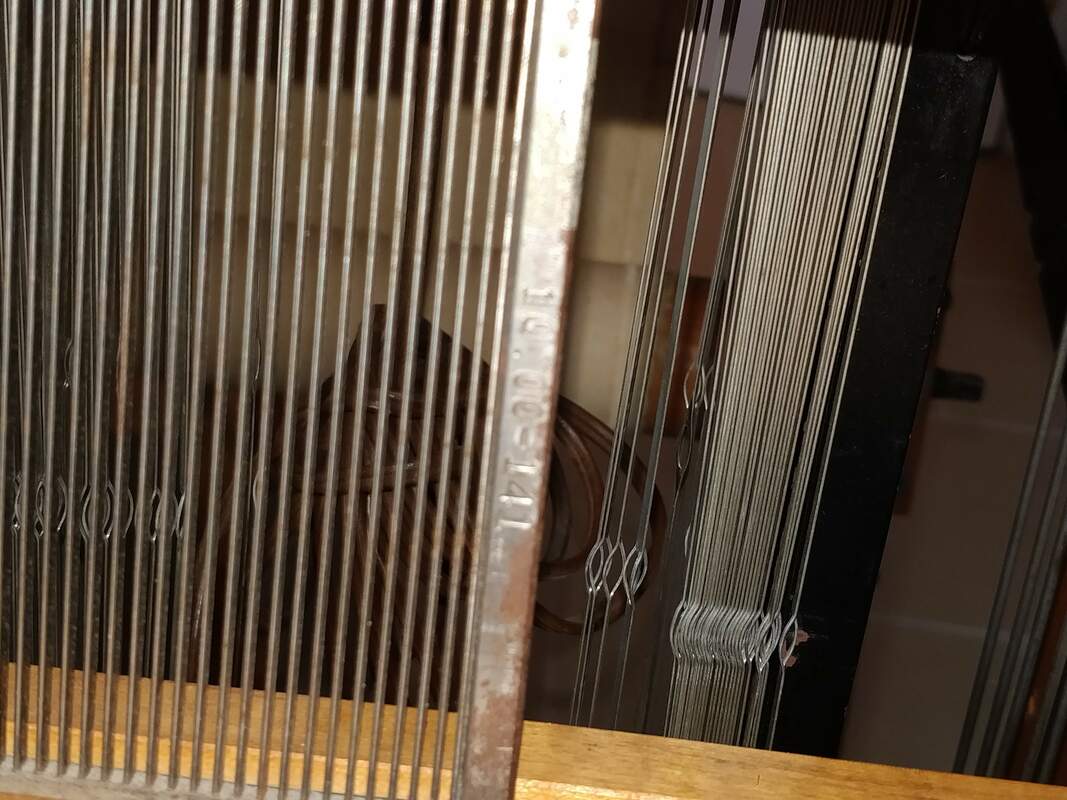
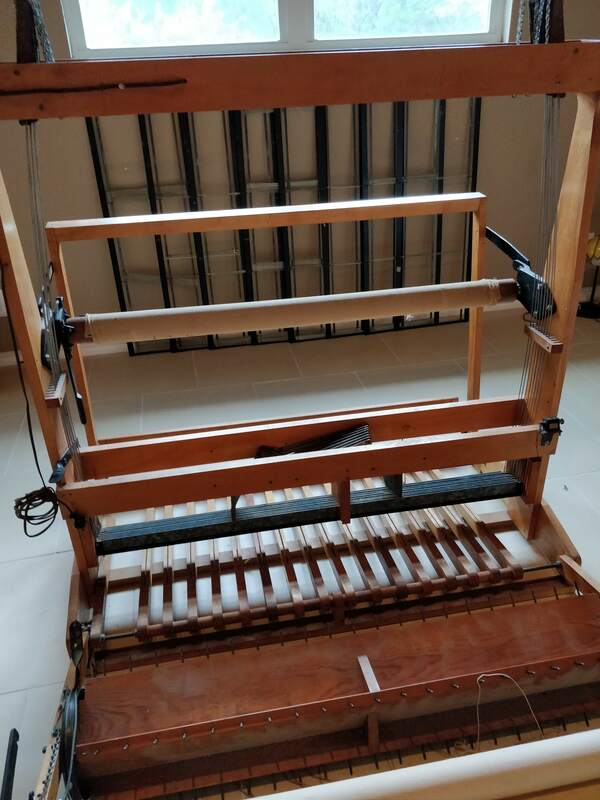
Here is the final picture of the loom. I put the beater bar back on and put one of the new reeds in.
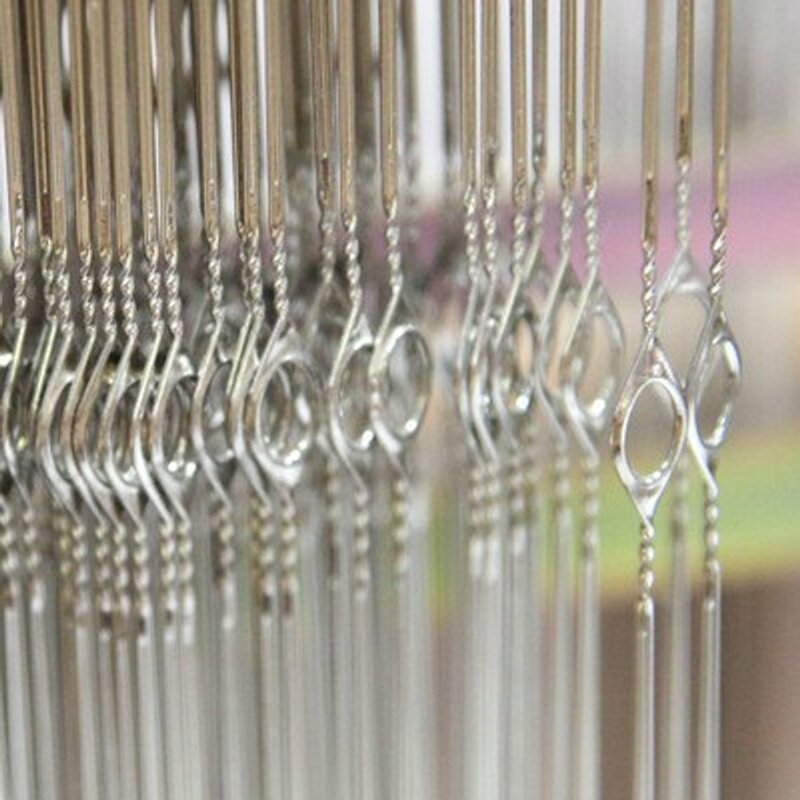
Today I am putting the new inset eye heddles on the frames and I will re-hang them. 
Picture
1 Comment

Weaving Accessories

3/17/2019

0 Comments

 
Having cleaned and de-schmutzed the loom last weekend - this took at least 4 hours on Saturday.
I then spent quite a bit of time working on that list, from last week, purchasing things I wanted/needed.

First I sent off a list of replacement parts I needed, to Macomber and after a few episodes of email and telephone tag, they are now ordered and paid for and should be here in a week or two. 

I then went looking for a raddle. Yes, I could make one or buy one from Macomber but I wanted to see what one would cost since, if it was a reasonable price; why not purchase it. I did some Googling and i found a 3D printed raddle that is in sections, so you can get as long or as short a length that you need. I bought 6 - 6" sections, 2 - 2.5" sections, and 2 ends for clamping it to the loom. 

Then I found beautiful turned Warp Weights, which I knew I would need eventually. I have in the past used old film canisters but these are just to sexy to pass up.

Then I went looking for a warping board but not a warping board. I did not want a warping board that is large, bulky and has to be hung on a wall or take up too much room when not in use. Since I also have a rigid heddle loom and it came with ONE warping peg, I went looking for more that I could use with a table. Lo and behold a large peg system does exist! Again, a hand crafted, made in America, maple warping peg set. This is enough to get me started but I might need a few extra single pegs for when I do a really long warp.

​Lastly I purchased insert eye heddles, which I think are better when doing rugs as the larger eyes are easier to slay and don't abrade the rug warp at all. To fund these I took ALL 2,000 flat, standard, heddles off the frames and bundled them in groups of 100; the counting and bundling took at least another 4 hours; and sold some of the on Facebook. Along the way I found 5 repair heddles, so they were set aside for if/when I need them. I sold over 600 of the flat heddle and I only purchased 100 insert eye heddles but that's enough to get me started.

Now, while I wait, I am playing with my weaving software, which I have not touched in 5 years, to plan my first project.
0 Comments

Cleaning and Refurbishing The Loom

3/9/2019

0 Comments

 
This past week I have started to assess the loom, below are lots of pictures of what I found and it basically comes down to this. It needs to be cleaned and only some minor work done to it.  YES, I could weave on it right now but with a wee bit of love and attention before I start any projects, would be beneficial.

NOTE: A lot of this information in the Sarah Haskell's Macomber Looms Manual, which is worth the $12.50 it costs. 

So here is what I am going to do. 
  • Remove the eye bolts and springs which connect the back beam breaks to the break pedal, this is so I can open the back beam and lay it on the floor (done last weekend)
  • Remove the treadle hooks and harnesses from the loom (done last weekend)
  • Open the front and back beams (done last weekend)
  • Remove the reed from the beater and remove the beater bar from the loom (done last weekend)
  • Remove the old cotton warp from the sectional back beam (did that last weekend and it was very dust packed) 
  • Remove the old tape from the treadles so they can be cleaned and washed
  • Wipe down all the chains that hold the heddle harnesses and that connect the treadles to the jacks
  • Wipe/wash all the wood with Murphy's Oil Soap as recommended by other Macomber loom owners
  • Apply daubs of Vaseline to the jacks where the bronze bushings meet the metal rod known as the Jack post
  • Apply silicone spray to the lamm and jack rods so they glide through the wood slots 
  • Wipe down the break drum on the sectional beam and inspect the ratchet on the regular beam
  • Remove the heddles on the 8 harnesses and set aside any bent heddles. Wipe the harnesses down, apply silicone to the harness tops and bottoms so the heddles, when put back on, glide smoothly.
  • Remove the old bumper pads from the beater bar - these will be replaced with new ones
  • Remove old pads from under the upper jacks each side of the castle
  • Remove the skirts from the front and back beams - they are functional yet old, yellow and bordering on crumbling
  • Remove the felt strip from the top and bottom grooves of the beater where the reed sits, need to confirm this with Macomber!
  • Clean the 3 reeds (10, 12, 15 dent)

Then I have to order the following, probably next week:
  • Bumper Pads for the beater
  • Beater Handle (new to me) as the beater does not have one
  • Felt strips for the reed holder in the beater
  • Pads for under the upper jacks 
  • Front and Rear Skirts
  • New strings for the sectional beam - I may have to make these
  • Wheels (new to me) as the loom does not have them and it would make moving it, for cleaning under it, easier
  • Extra Treadle Hooks

Of course after I am done cleaning, I then get to put it all back together, after the replacement parts arrive, why do this twice!

There are things I need but I don't want to order just yet as they maybe given to me when the rest of the accessories are sorted by the person I bought the loom from
  • Warping board
  • Tension box
  • Raddle, for use with the regular beam or I will make one
  • Extra treadle hooks, there were only 10 in use when I bought the loom
  • Handles for the drum and ratchet brakes
  • Maybe get a 5 dent reed since rug warps are thicker and a finer dent reed can be abrasive!
  • Insert eye heddles, I had them on my other loom and like them better for rug warps

Having had my second cuppa coffee, it is now time to start the cleaning
0 Comments

    RSS Feed

    About Laurie

    Laurie lives in central Texas with the memory of Erich, a.k.a. "the shop elf", who was her hubby of 35+ years and Cowboy Boots, the cat; her metals studio including 100+ hammers and 300+ chasing tools; her sewing studio which has a sewing machine, a closet filled with fabric, hundreds of skeins of embroidery floss and perle cotton, silk and other materials, and Mrs. King the dress dummy; one weaving loom, assorted knitting needles, tubs of yarn; assorted art supplies of pencils, colored pencils, water color pencils, water color paints, acrylic paints, markers, and pads of paper; lots of books; plus a plethora of geeky tech gadgets, computers, and more.

    Archives

    May 2025
    March 2025
    February 2025
    January 2025
    December 2024
    November 2024
    September 2024
    August 2024
    July 2024
    May 2024
    April 2024
    March 2024
    January 2024
    December 2023
    November 2023
    October 2023
    September 2023
    August 2023
    July 2023
    June 2023
    May 2023
    April 2023
    March 2023
    February 2023
    January 2023
    December 2022
    November 2022
    October 2022
    September 2022
    August 2022
    July 2022
    June 2022
    May 2022
    April 2022
    March 2022
    February 2022
    January 2022
    December 2021
    November 2021
    October 2021
    September 2021
    August 2021
    June 2021
    May 2021
    April 2021
    March 2021
    February 2021
    January 2021
    December 2020
    November 2020
    October 2020
    September 2020
    August 2020
    July 2020
    June 2020
    May 2020
    April 2020
    March 2020
    February 2020
    January 2020
    December 2019
    November 2019
    September 2019
    June 2019
    May 2019
    April 2019
    March 2019
    February 2019
    November 2018
    October 2018
    September 2018
    August 2018
    July 2018
    June 2018
    May 2018
    April 2018
    March 2018
    November 2017
    October 2017
    September 2017
    August 2017
    June 2017
    May 2017
    April 2017
    March 2017
    February 2017
    October 2016
    September 2016
    August 2016
    June 2016
    May 2016
    April 2016
    February 2016
    January 2016
    November 2015
    October 2015
    September 2015
    August 2015
    July 2015
    June 2015
    May 2015
    April 2015
    March 2015
    February 2015
    January 2015
    December 2014
    October 2014
    September 2014
    August 2014
    July 2014
    June 2014
    May 2014
    April 2014
    March 2014
    February 2014
    January 2014
    December 2013
    November 2013
    October 2013
    September 2013
    August 2013
    July 2013
    June 2013
    May 2013
    April 2013
    March 2013
    February 2013
    January 2013
    December 2012
    November 2012
    October 2012
    September 2012
    August 2012
    July 2012
    June 2012
    May 2012
    April 2012
    March 2012
    February 2012
    January 2012
    December 2011
    November 2011
    October 2011
    September 2011
    August 2011
    July 2011
    June 2011
    May 2011
    April 2011
    March 2011
    January 2011
    December 2010
    November 2010
    August 2010
    July 2010
    June 2010
    May 2010
    April 2010
    March 2010
    February 2010
    January 2010
    December 2009
    August 2009

    Categories

    All
    42
    Android
    Bfa
    Boots
    Bunny Bravehart
    Codesmith
    Comic-Con
    Covid
    Day Job
    Family
    Fencing
    Fiber
    Gorge
    Health
    Hike
    Jewelry
    Knitting
    Laurie
    Metals
    Minecraft
    Pandemic
    Photography
    Quilting
    Retirement
    Road Trip
    Scotland
    Sources
    Spinning
    Temari
    Texas
    The Big Walk
    Weaving
    Web
    Yubinuki

Kernology, Kernology.com, Laurie Jane Kern © 1998 - 2020 | All Rights Reserved