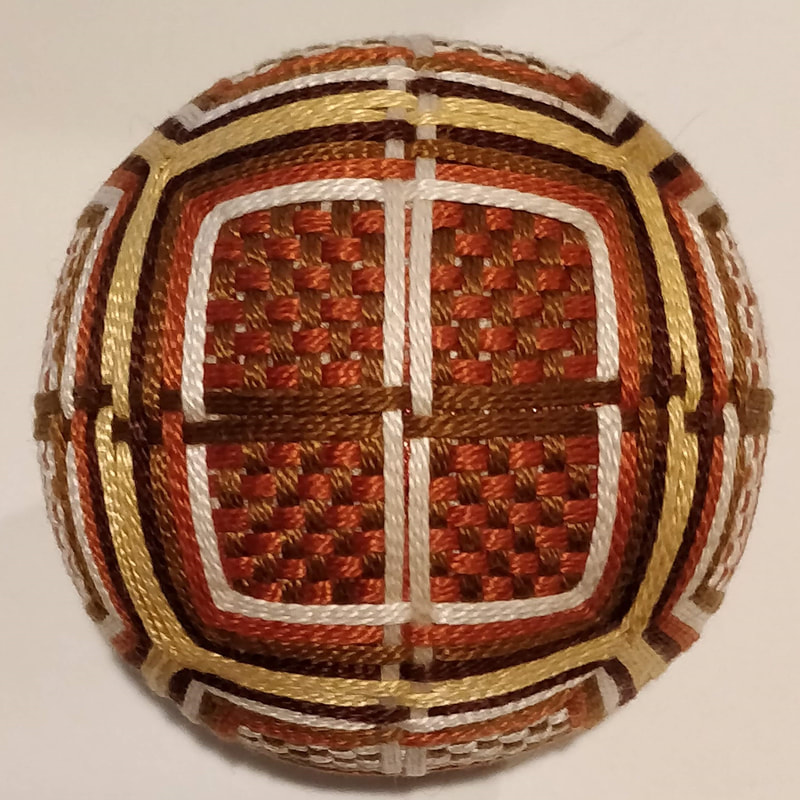
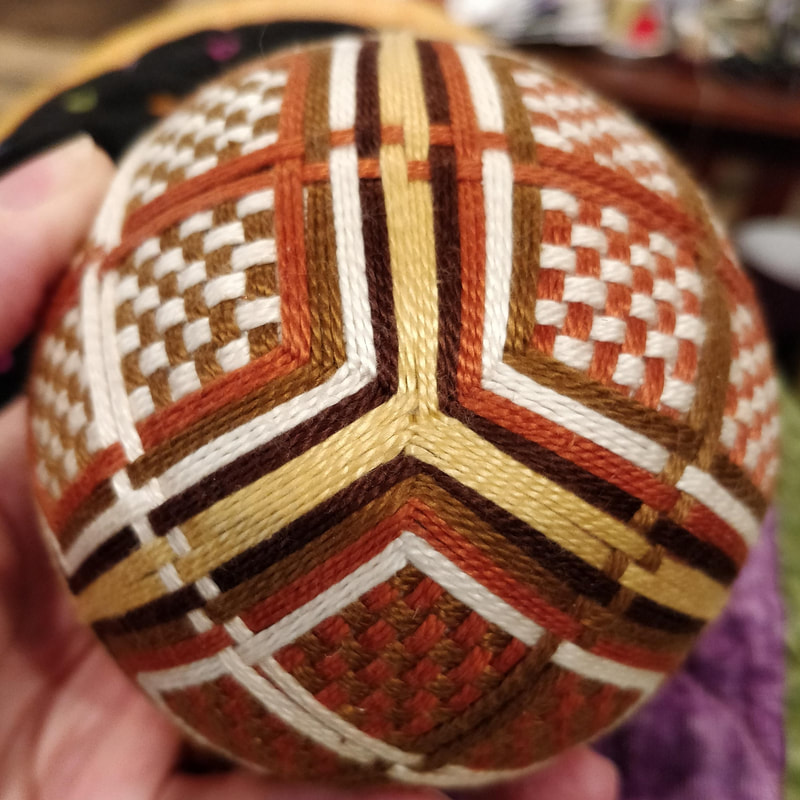
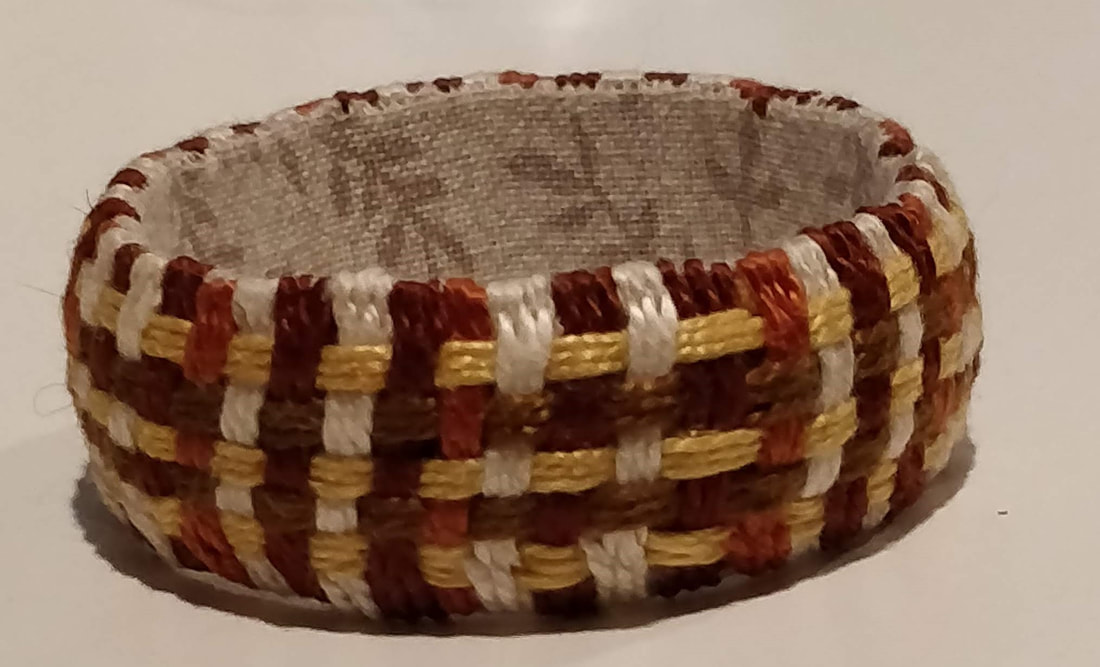
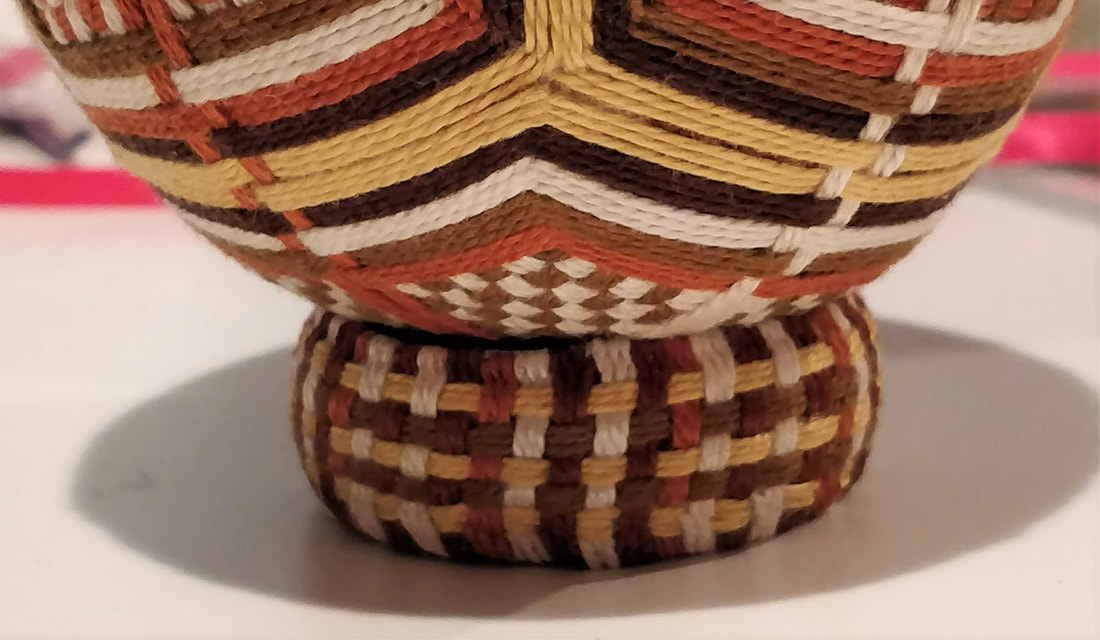
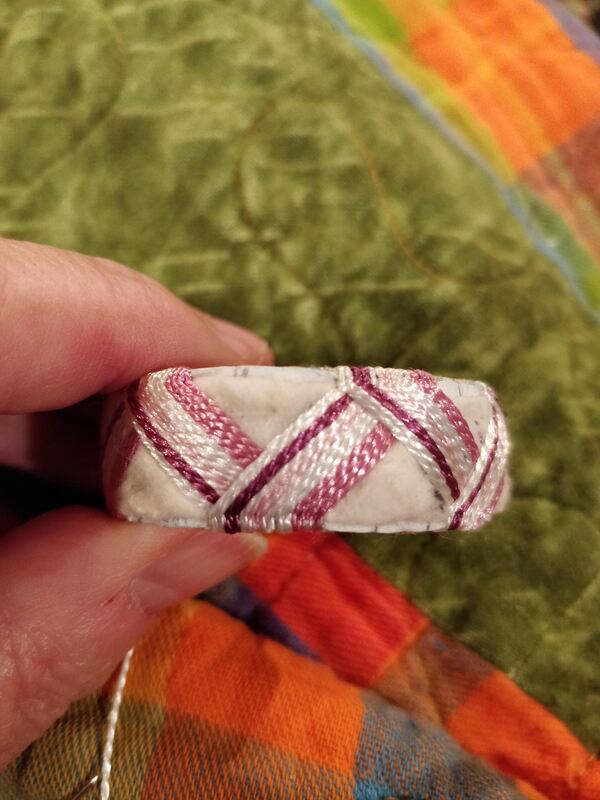
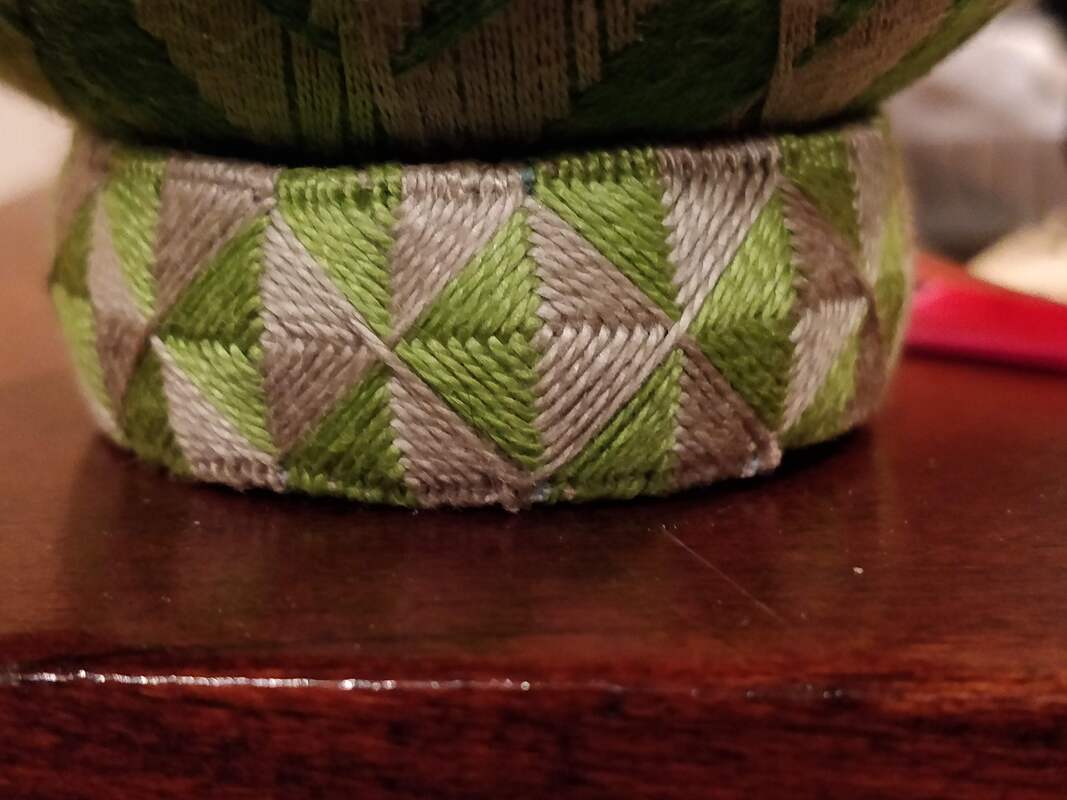
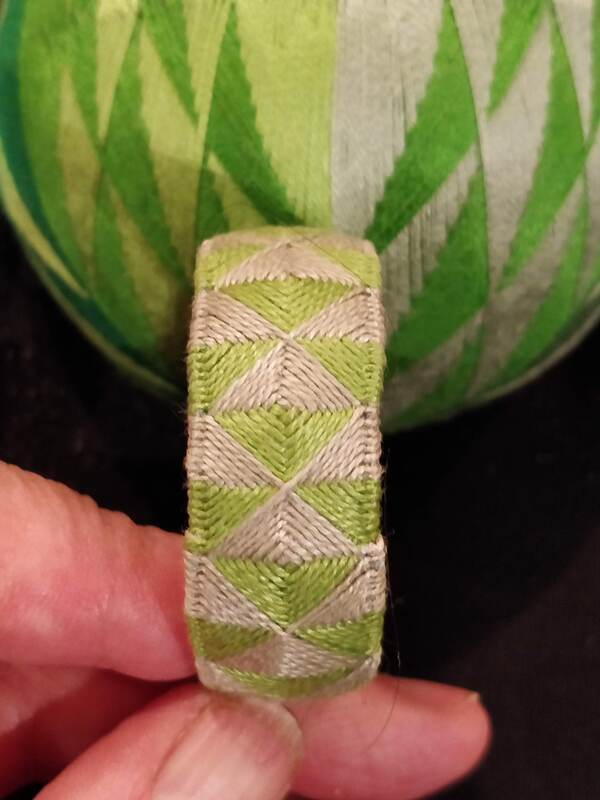
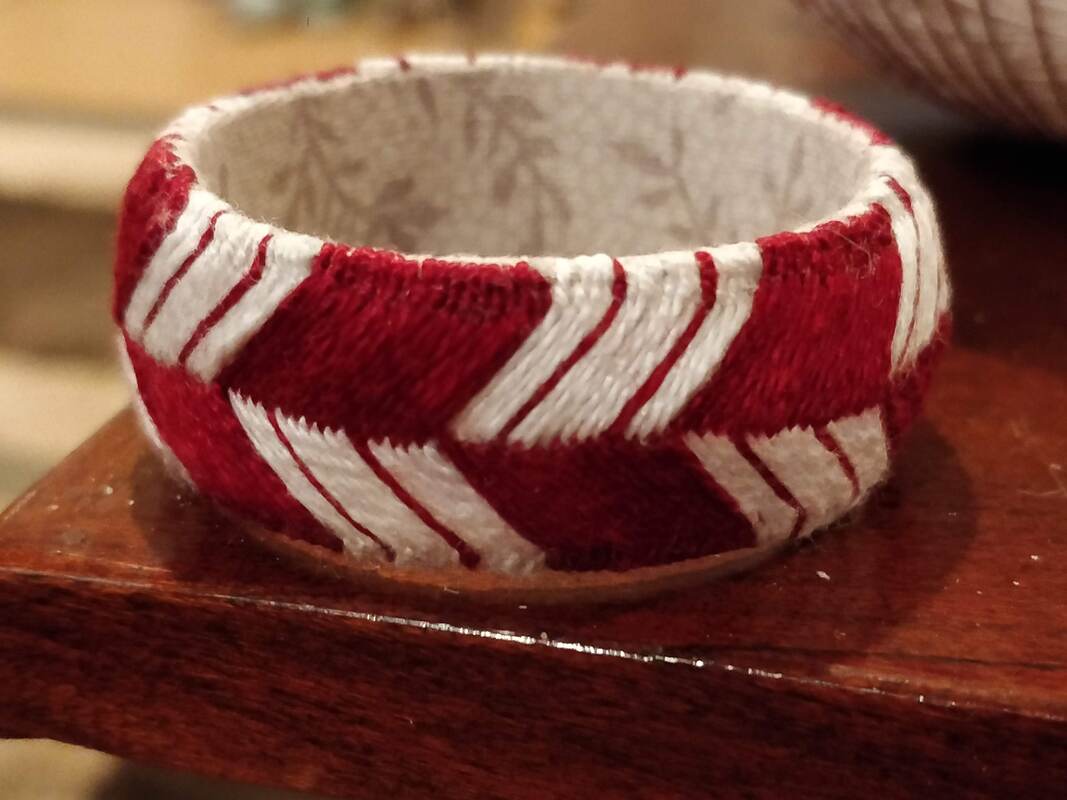
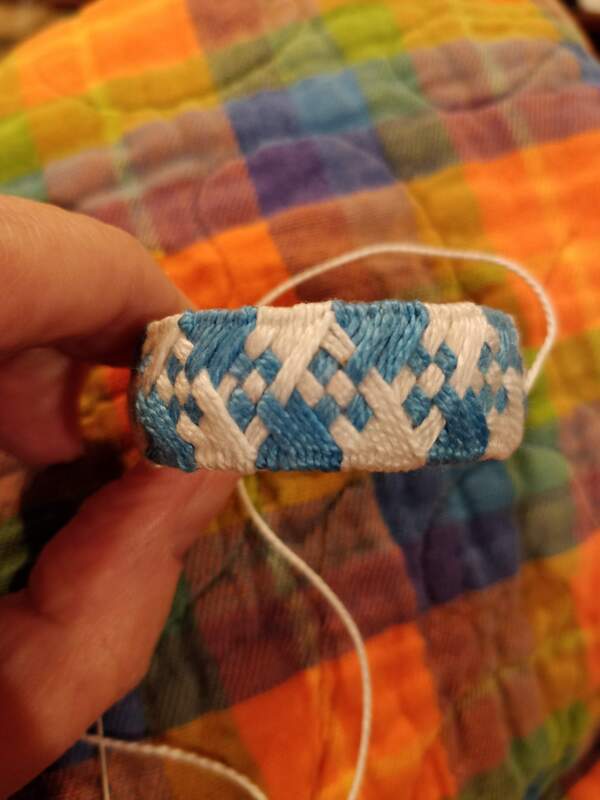
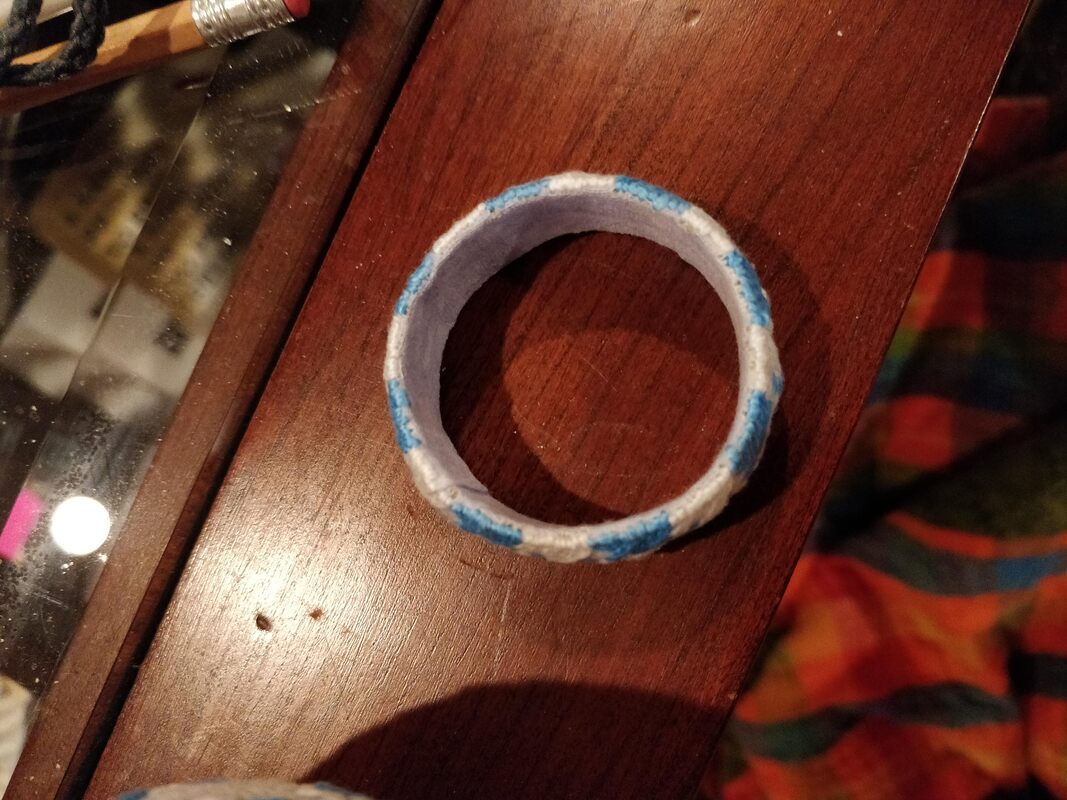
Last month I started this basket weave temari. I based it on a temari from one of the books from Japan (Cosmo #5) but where they used 2 colors, I used 5 - 3 for the main weaved squares and two for the framing. I also changed up how the bands weave into the framing. I chose one direction (x, y or z) for each color this results in 2 of the 3 main colors being woven in each square and the squares on opposite sides of the temari are the same. I also took many measurements long the way to make sure everything stayd "true" so the framing at the corners would meet nice and tight. Then I made a coordinated yubinuki using the same colors, again in a basket weave where stitched threads are the warp (vertical threads) and the weft (horizontal) are woven but NOT stitched.
|
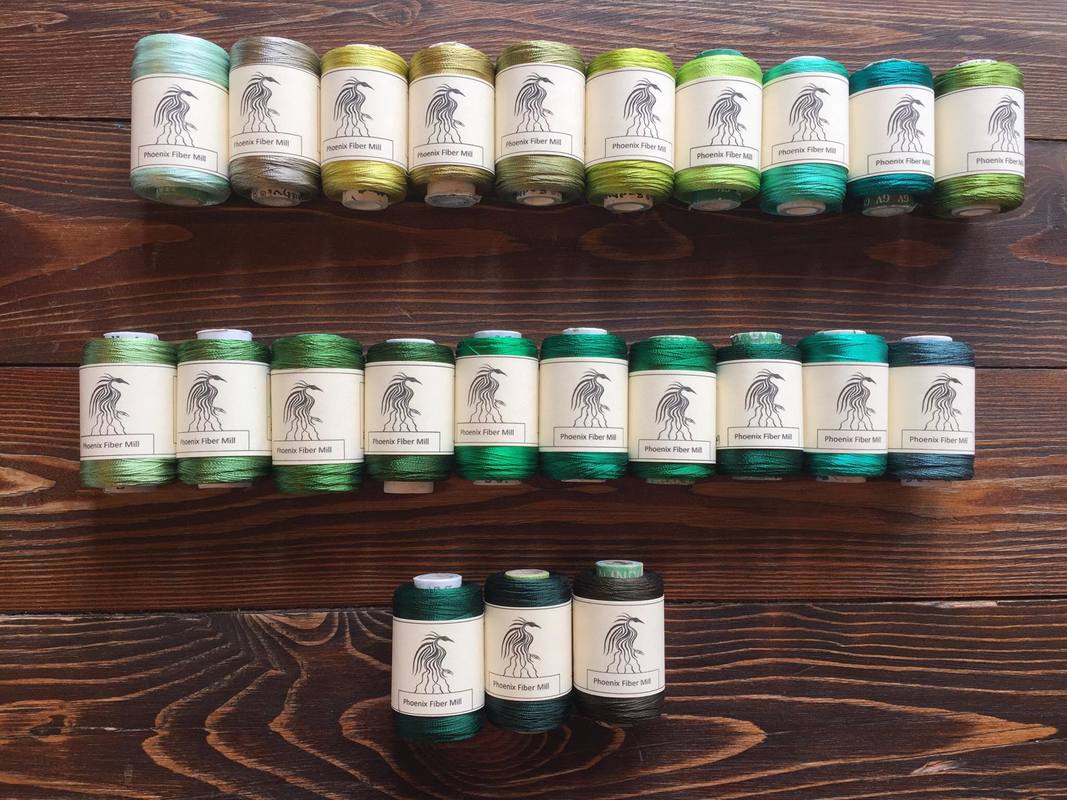
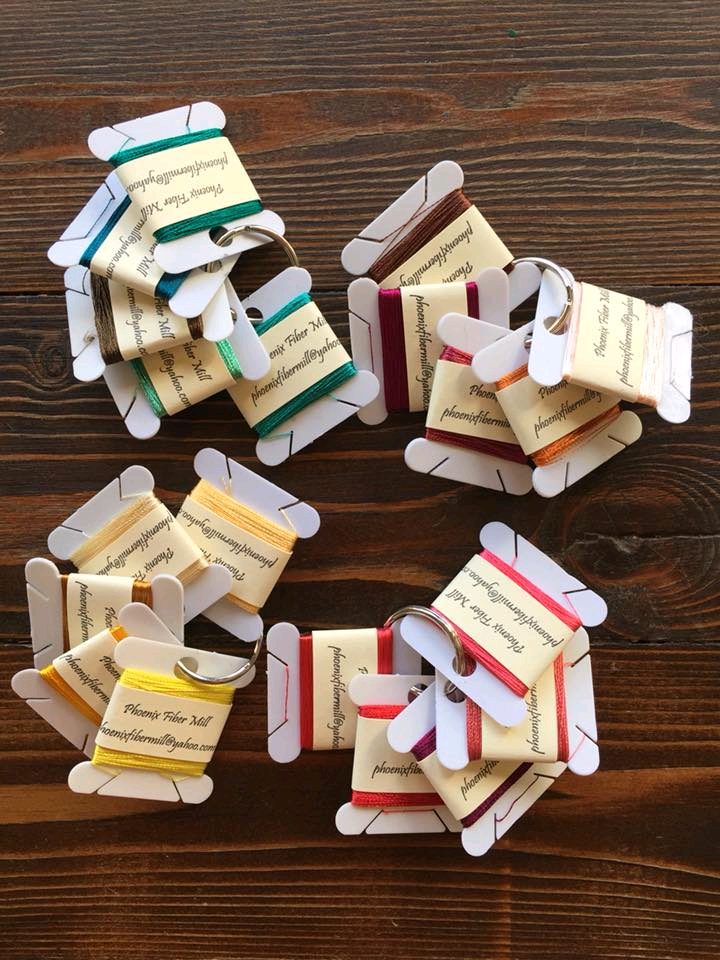
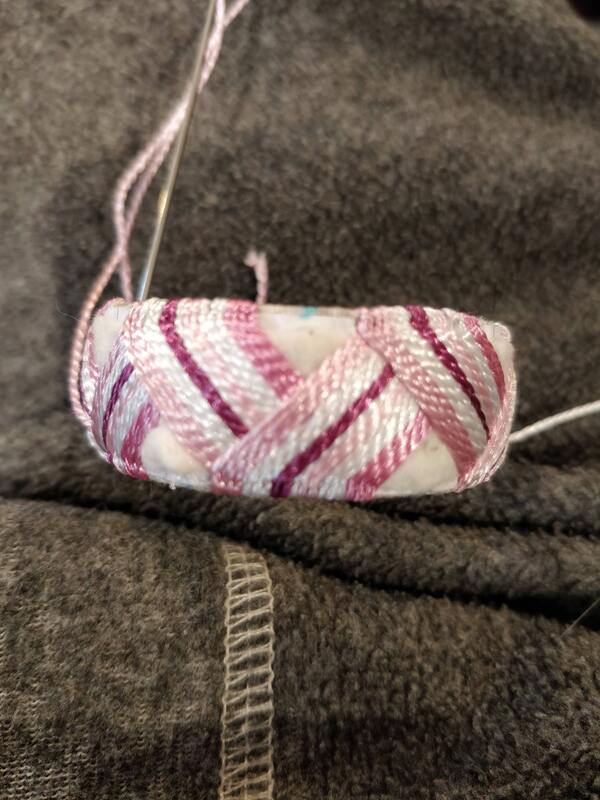
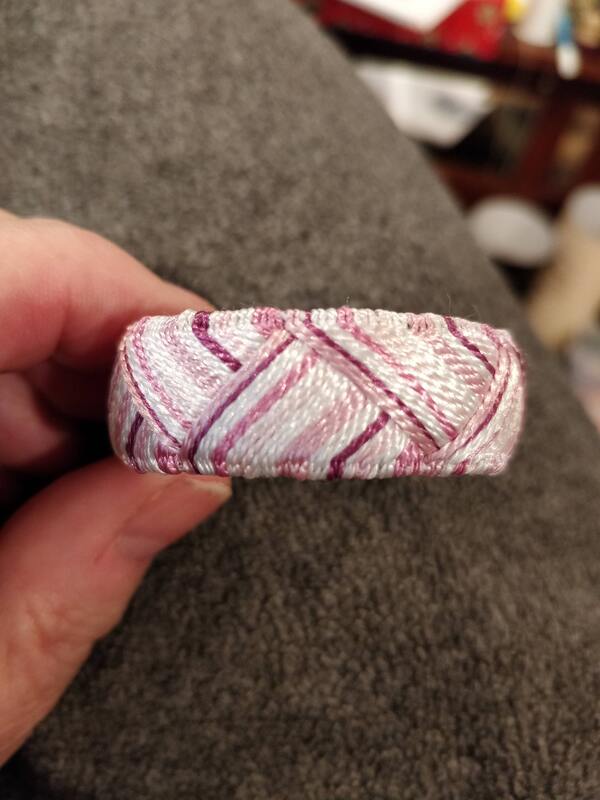
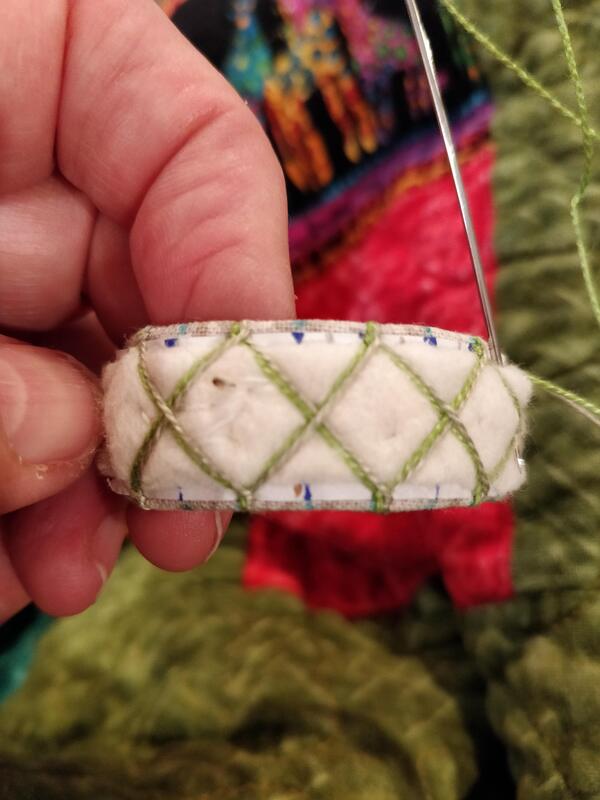
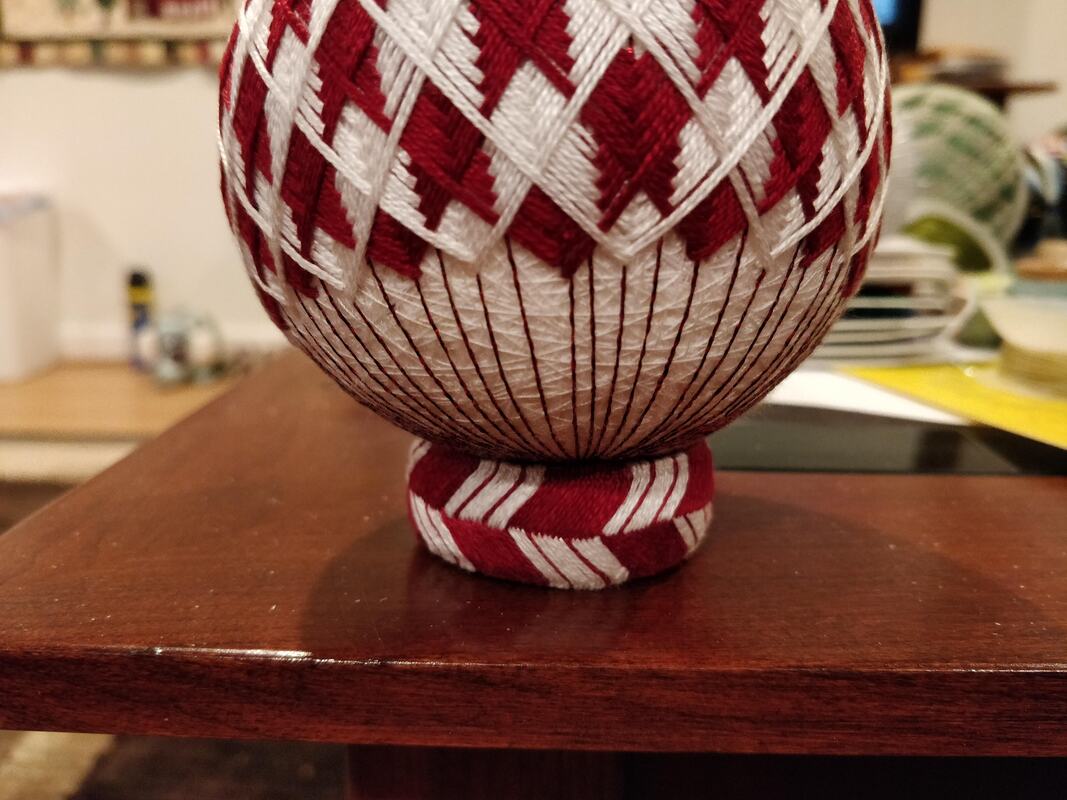
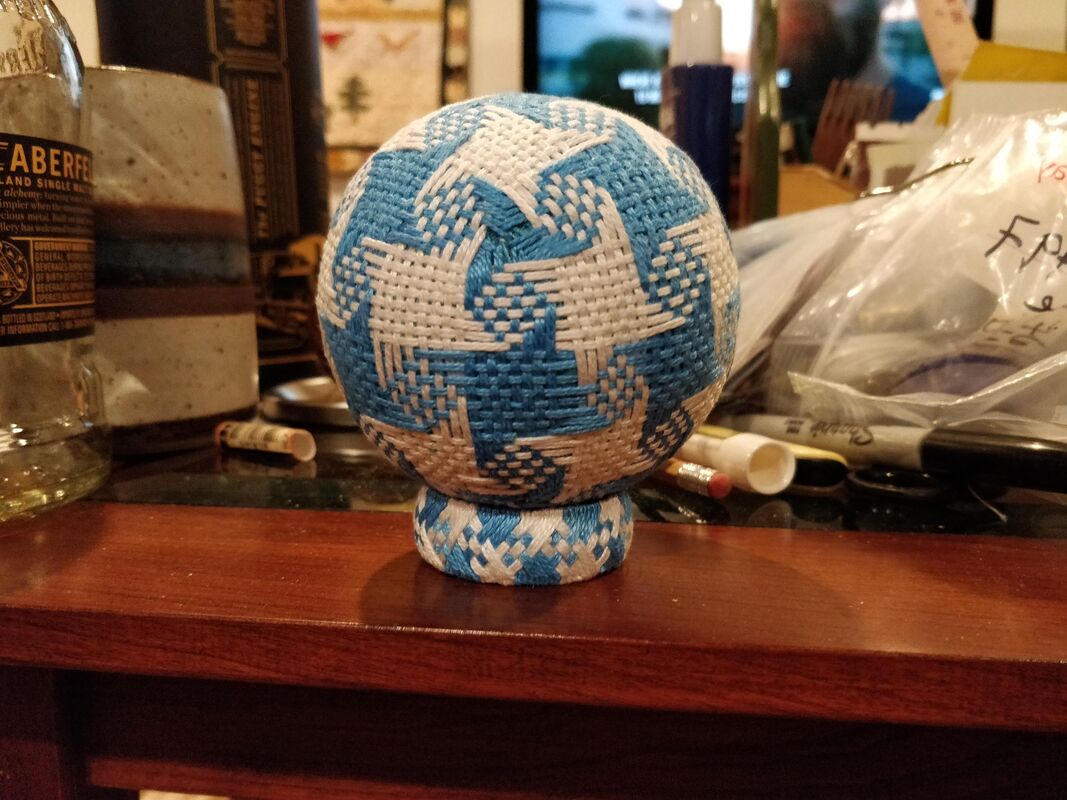
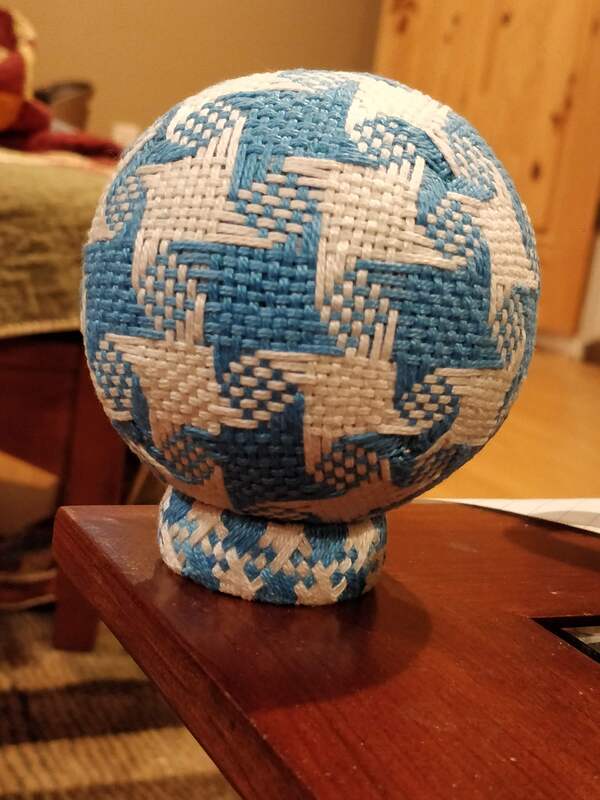
A few more yubinuki - the pink one is for the Plum Blossom temari that lives in Scotland, which I made last year. The green one is for the Cedar temari I made last month. For the past few weeks I have been working on some advanced temaril - this first is Cedar and this was done 3 times to get it correct. It is stitched with 3 strands of floss to make an all over covering. The second is a type of yubinuki obi design that is stitched with double perle cotton thread. I stitched twice as my first color choices did not get the design to pop. I then decided to make a yubinuki stand to go with it it. In my prior post I made a Ninja Star temari. I decided to make a yubinuki ring stand for it instead using a plexiglass ring stand like those use to display stone spheres and eggs. For this core, I used part of a card board tube (the core of a toilet paper roll) and cotton quilt batting. The design would be the same colors as the temari and have a small woven section so the ring base is similar but not the same as the temari. I have decided that from now on, I will be blogging about Yubinuki over on my artist site - The Adventurous Smith. I have copied the existing posts about yubinuki over there and soon the tutorials will be posted there as well. 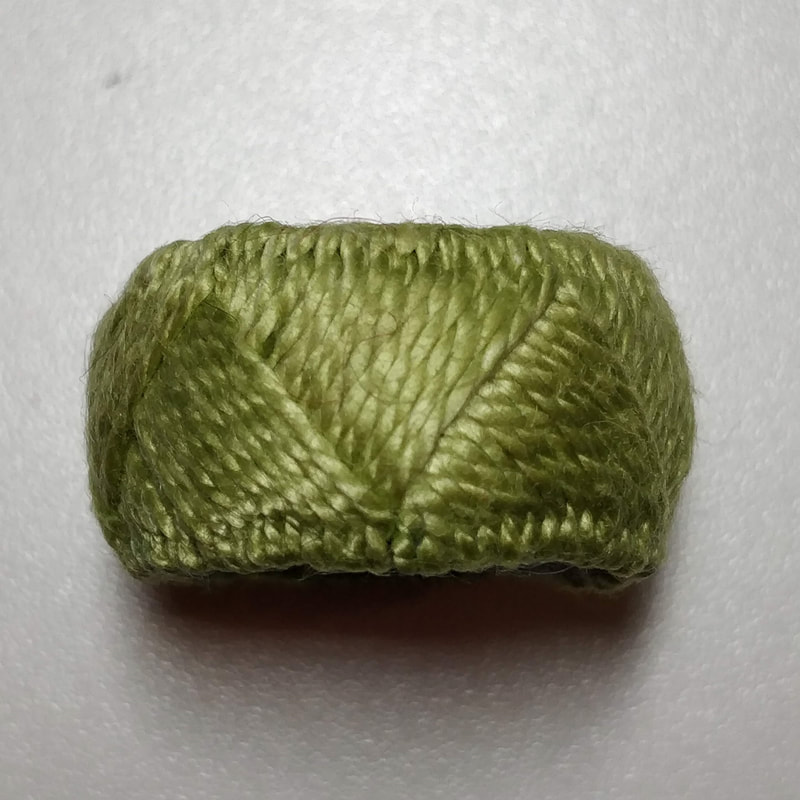 This post is to clarify and expand on a few things that are required for making a core, before a core is made; this is so the appropriate items are acquired. First up is the card stock used for the core. When choosing the card stock (aka paper) that will be inside the core, it should be a nice thickness that when rolled at least twice, into a circle, it will provide enough support to the core and yet be a tiny bit flexible. DO not use regular everyday printer or copier paper for this, it is too thin, even if there is more than one layer of it. This paper is known as "20 Bond" and this refers to the weight of 500 uncut 11" x 22" sheets. The thicker the paper, the larger the weight (bond number). A good quality paper is in the range of 16-36, but these are not thick enough. So what is a good paper for Yubinuki? A paper that has a weight over 70 is a good place to start. FYI photo paper that is used in a printer is in the range of 24-71 pound, so if you want to buy thicker high end photo paper to then cut up go ahead, it is just an expensive way to get the paper for the core when there are less expensive way. And what way would that be you may ask? Oh, how about the paper used for a quality magazine, catalog or brochure cover; not the paper inside the magazine or catalog but the cover of it! This paper is classified as 80-100 pound and the coating (a type of clay) that is added to the paper for the printing to stick, helps make it a bit more durable (in case the Yubinuki gets wet). So I save the covers from magazines that I done reading but don't want to keep. I also save the covers from all sorts of catalogs I get; I particularly like the J. Peterman Company catalog covers. Another good paper source is those thick 'card' advertisements that are stuffed in the junk mail. Just make sure you can get at least 4 inches in length. 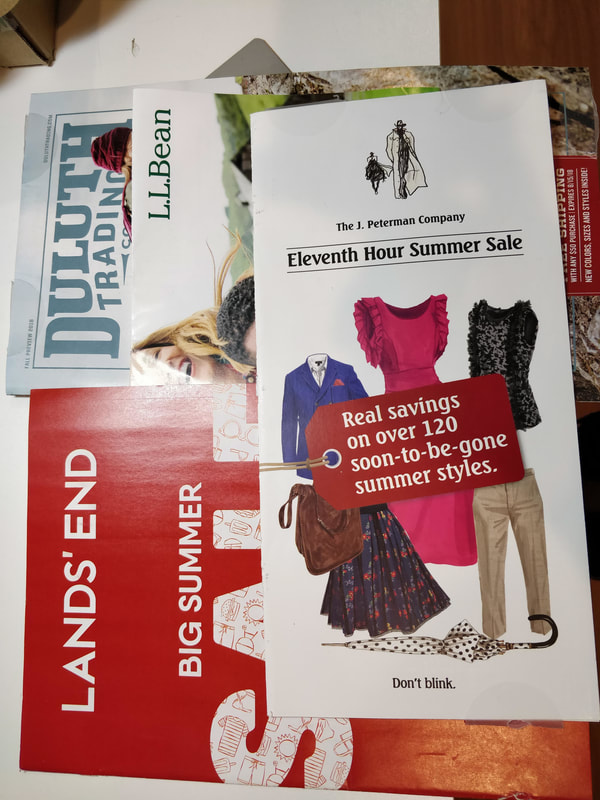 And what way would that be you may ask? Oh, how about the paper used for a quality magazine, catalog or brochure cover; not the paper inside the magazine or catalog but the cover of it! This paper is classified as 80-100 pound and the coating (a type of clay) that is added to the paper for the printing to stick, helps make it a bit more durable (in case the Yubinuki gets wet). So I save the covers from magazines that I done reading but don't want to keep. I also save the covers from all sorts of catalogs I get; I particularly like the J. Peterman Company catalog covers. Another good paper source is those thick 'card' advertisements that are stuffed in the junk mail. Just make sure you can get at least 4 inches in length. To find out more about paper weights and thicknesses, refer to the chart from this website Second item is the lining material. This material is visible as the inside surface of the Yubinuki. It is the first layer that is laid down, as part of the making the core and it covers the paper that provides the rigidity. In the picture to the right, the blue material on the core shown below is the lining material. The fabric for the lining material should be cut on the bias, this is so it can stretch, and follow a curve without causing pleats or creases. The fabric should at least be 28 mm wide. Why? the paper is cut to 11 mm so the fabric has to cover the inside surface and then be folded over and overlap the fabric folded from the bottom; this will make more sense in core making tutorial. The fabric should be cotton, as it does make contact with your skin and it should not be itchy and can absorb hand moisture. The fabric color can coordinate with the thread colors used to stitch the design but going with all black is also a wise choice since it won't show any dirt. You can make your own bias tape and there are lots of information about that out on the web but if you want to cheat, go purchase bias tape from the sewing store but this is a polyester material. If you go this route get a DOUBLE FOLD tape that is 0.5" (12.75 mm wide; when the double folded tape is opened up, it will be 44 mm wide and that is more than enough for making the core. 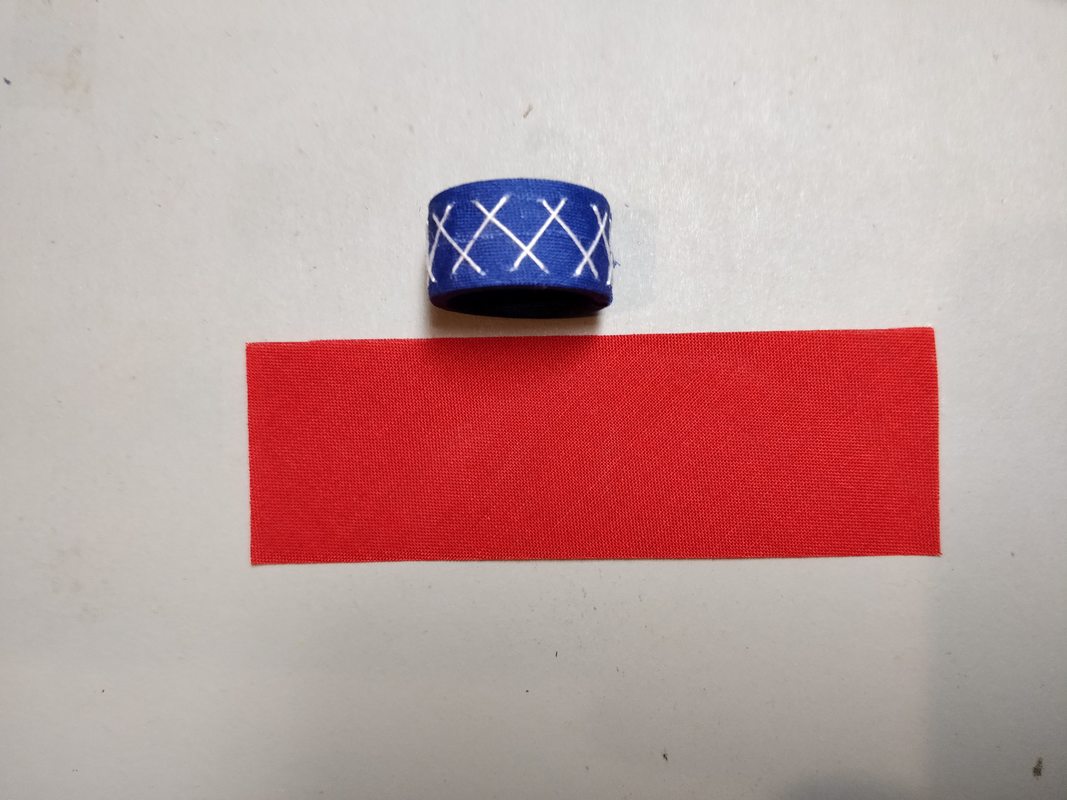 The third an last item to discuss is the padding or as I call it wadding. This is what prevents the needle, when being pushed with the Yubinuki, from putting pressure on the finger in one spot. Traditionally this is uncombed silk fiber formed like a sheet and stretch really well so that it's easy to handle and form a suitable padding to the thimble bases. This sheet of silk fiber is what a spinner might acquire. This sheet of silk is not easy to find in the USA but from some spinning supply stores you can find spinning caps and hankies. There are alternatives to using silk that can be used from spinning suppliers and this would be roving - these are fibers that have been carded and aligned to make it easier to spin; look at Tencel, soy, cotton, and bamboo. Other materials such as cotton (embroidery) floss that has had the strands separated and laid down in parallel lines. Cotton balls can be used that are carefully pulled to create a long set of fibers (think of roving) that can be wound around the core. Quilt batting can also be used and can be found easily; it is available in many thicknesses and materials besides cotton such as wool and silk. If you decide to use this, go for the thinnest batting possible. This picture shows, from left to right - Soy for spinning, Cotton for spinning, Silk Cap for spinning all of which I purchased at various fiber festivals. 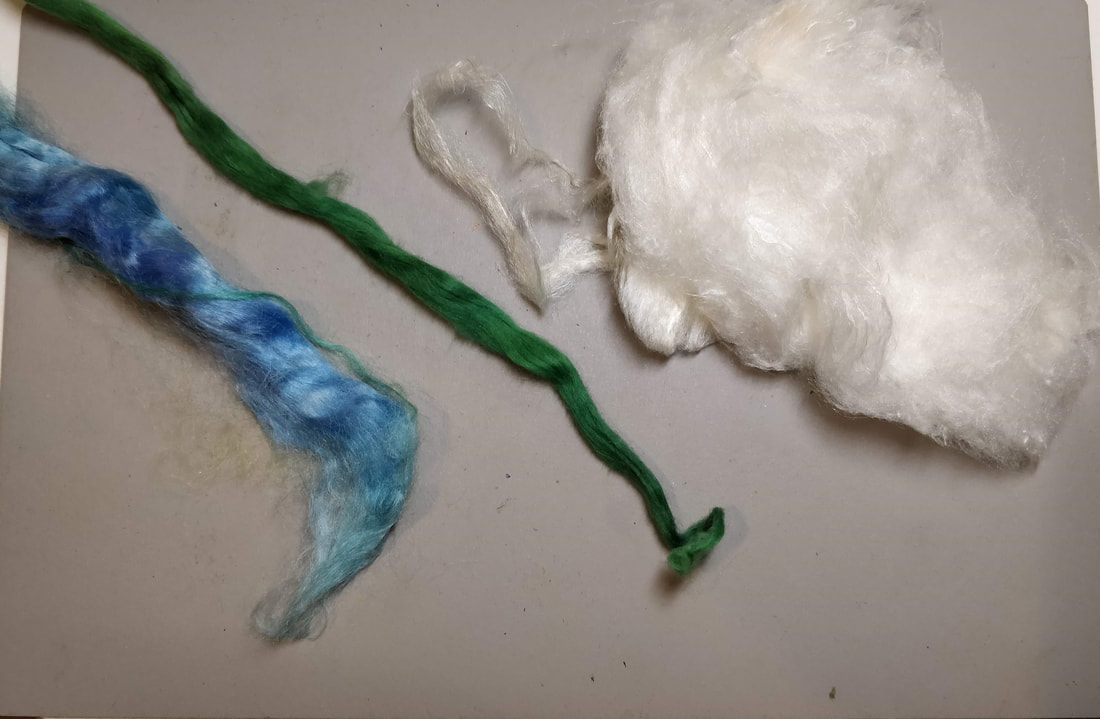 In the other post about materials, I wrote about what types and sizes of thread to use to make yubinuki. In this post I will tell you my sources for them. Threads are very particular to the user; I like cotton and silk and if I could I would use silk all the time. But I also have used polyester, poly/cotton, soy, linen, bamboo, and Tencel. Threads for making Yubinuki can be found almost anywhere provided you are willing to look and try them. Having a background in sewing/weaving/knitting I go to Fiber Festivals around the area where I live and I look for threads and yarns that are lace weight, that could be used for making yubinuki; that is how I recently found the silk thread supplier (below) and silk lace weigh yarns. Go to knitting store as the fine threads for crochet (size 30 and 80) are also good to use. Additionally go to needlepoint, embroidery, cross-stitch and other hand sewing stores who stock not only the big name manufacturers of threads but some of these smaller makers too. Then of course there is the web! You can search and find suppliers of threads from around the world, you just have to look and Google will be your friend! And do not rule out eBay, Etsy or Amazon as possible sources. It was via eBay that I picked up some silk floss and perle from Japan and I am still looking for online stores to source more from. Now I am going to point you to some of the on-line vendors that I use for various threads. Yes; I now there are others but these are the places I like to use and none are local or big box stores.
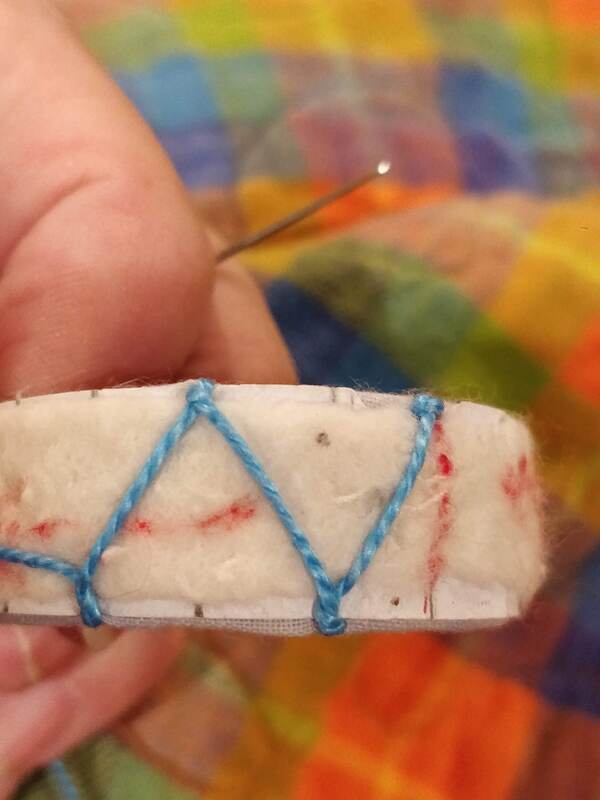
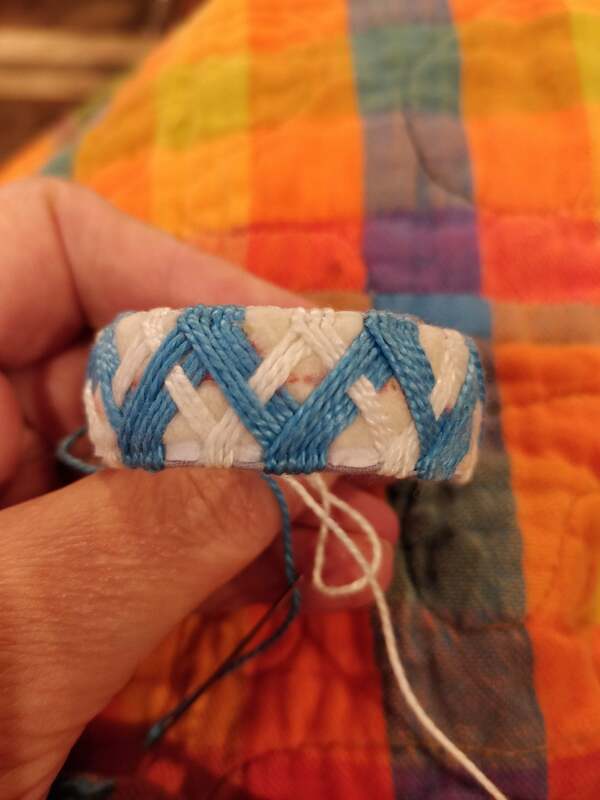
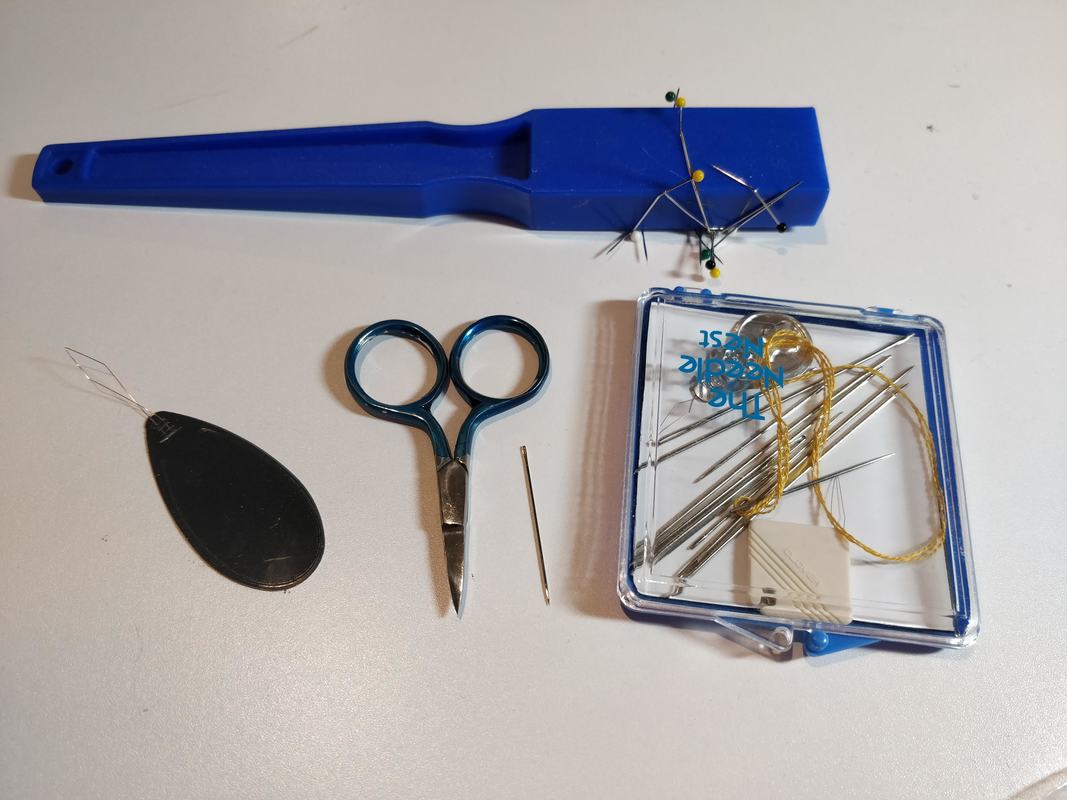
  In this post I discussed tools and supplies. Now let's talk materials for the yubinuki of which there is only ONE - THREAD. This is the primary material to make the design. There are several things to consider when selecting the thread for your yubinuki: color, material, and size. I don't think I need to discuss color at this point as that is important for your pattern, which shall be discussed in a later post. But the thread material and size are what be discussed in this post. First some general information: Material and Size Thread Material: In Japan, the traditional materials are either cotton or silk which was taken from the remnants of weaving. These are the two fibers still primarily used in modern times. Your skill level, design and personal preference will influence what material that is selected. There are also nice threads in linen, polyester, and blends and are also metal threads which is where a very fine wire is wrapped on a cotton or silk core; with some searching you can find silver, gold, and copper. Thread Size: Thread size is not actually measured in inches or millimeters; there are 3 major measuring system and each thread manufacturer picks how measure their thread; trust me it is confusing and I learned quite a bit. What is important to know is that the thread size will influence how detailed the design of the pattern can be; the finer the thread the more details the pattern can have. There are 3 ways to measure thread: Weight (meters per 1 gram), Tex/Length (grams per 1000 meters) or Denier ( weight in grams per 9000 meters). Perle cotton is in the weight system and Japanese silk is sometimes given in denier and some I can't figure out at so let not worry about it at this point Let's now let's look at some actual threads which can be used to make yubinuki. The letters the start of each paragraph refers to the letters in the picture below. A) Cotton Perle Size 5: A 10 gram ball contains 45 meters. B) Cotton Perle Size 8: A 10 gram ball contains 80 meters. C) Cotton Perle Size 12: A 10 gram ball contains 120 meters. D) Cotton Perle Size 16: On a 10 gram ball which contains 143 meters. E) Tatting Cotton Weight 10: On a 25 gram spool which contains 112 meters. F) Tatting Cotton Weight 20: On a 25 grams spool and contains 192 meters. G) Tatting Cotton Weight 40: On a 25 grams spool contains 274 meters. H) Sewing Silk Perle: A spool contains about 17.5 yards or 16 meters and is about a cotton perle #12 in size. I) Silk Perle #16: Labeled as 1000 Denier, which is on a card and contains 20 meters. This is in between a perle size 12 and size 16 and is marked as 0.25 mm in diameter. J) Silk Perle #9: This is on a card and contains 80 meters. This is finer than a perle size size 16, it could be a perle size 30 but I can't find much information on this size but it is finer than the 1000 denier. K) Silk Thread: This is on a spool that weighs 23 grams and has 503 meters. There is also a 5 thread assortment, with each bobbin having 40 yards for a total of 200 yards. It should be mentioned that there are other sized that have not been shown or other threads like cotton or silk floss's as well as various hand/machine sewing threads. Remember as the "size" goes up, the thread diameter gets smaller; if a pattern uses a Perle Size 5 and you want to use Perle Size 8, you will have to take more stitches per division and that may require the overall pattern to be adjusted. When making your first yubinuki, I suggest starting with a perle of size 5 or size 8 as you will have less stitches and a thicker thread is easier to work with. As experience grows, then move to using size 12 and 16 and eventually you will be using silk "sewing" thread. I will discuss where to purchase these threads in the next post. 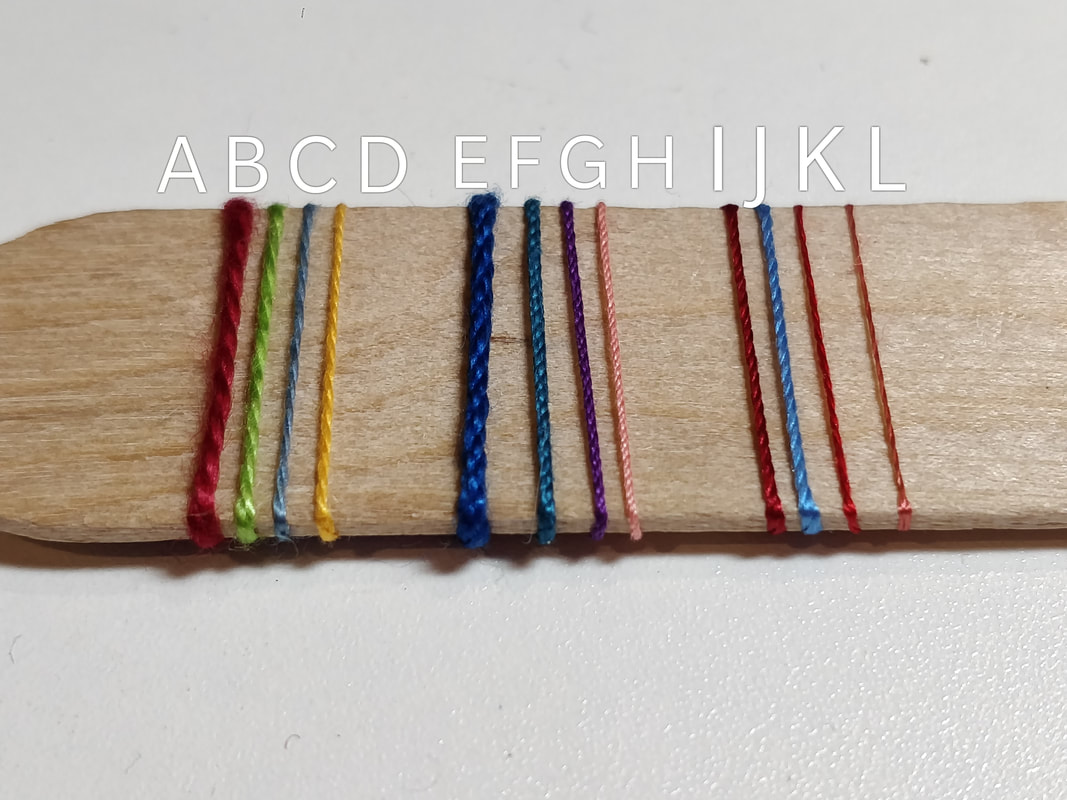 Before you can make a yubinuki, one must have some tools and supplies. I will cover the materials for making a yubinuki in another post. I use the term supplies as those items that are used again and again to make a yubinuki where as materials are those items required to make a specific yubinuki, yet they can be generally detailed. Here is a list and a description of what/why you need them. Again, this is a list based upon what I have found to be readily available here in the USA. NOTE: All of these will make sense as you work through the various tutorials. Tools:
Supplies:
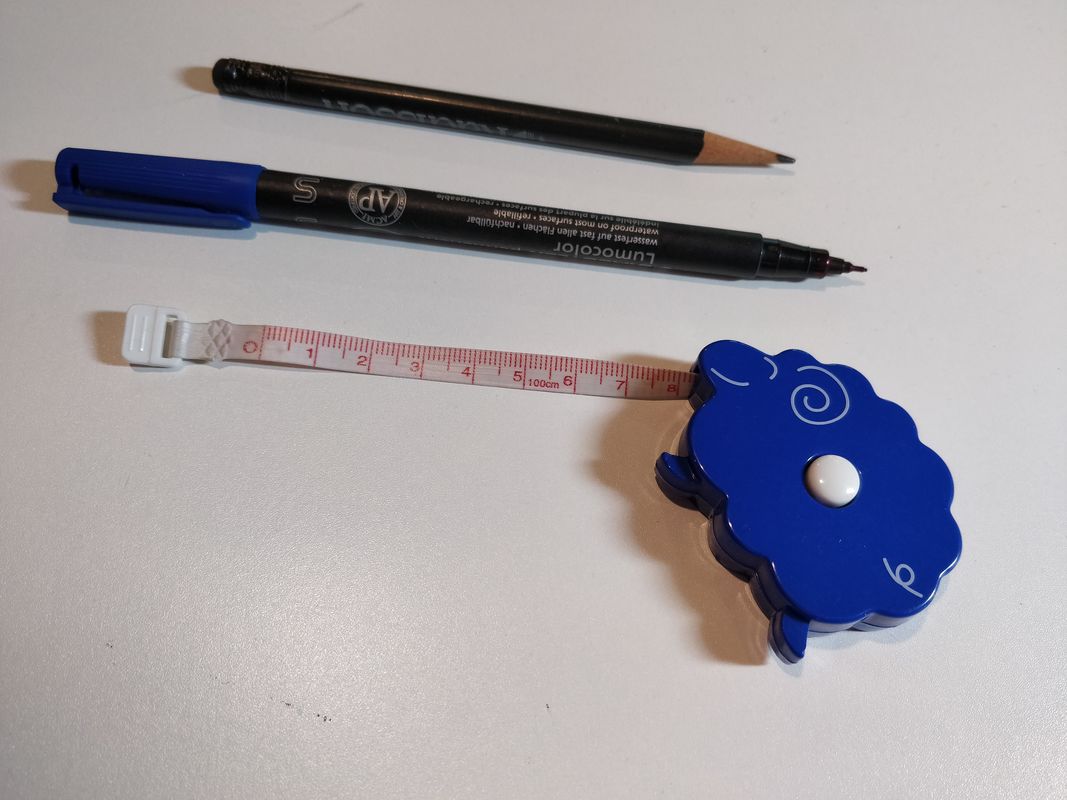
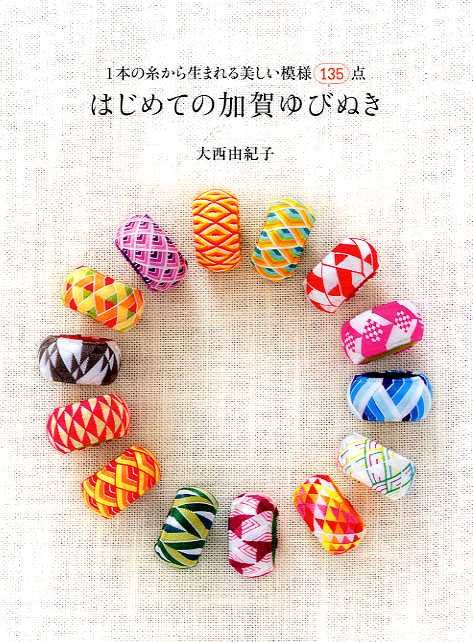
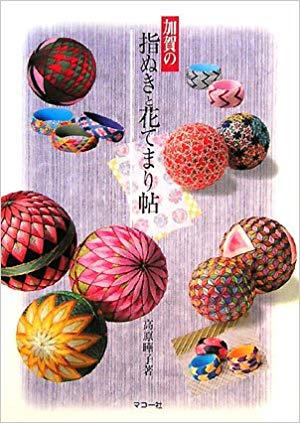
The pictures below will help you visualize some of the tools you will need. Next time I will discuss the materials that are used to actually make a yubinuki. Speaking of books from Japan... There are currently 6 pattern books available with 2 of them combined with Temari patterns. There are some books that are pictures from exhibitions but I have not bought them yet. These are good to have, eventually because once you become adept at reading patterns and making yubinuki, just a pictures can guide you on figuring out the sewing pattern. So how does one use the Japanese books?? And, NO I can't read Japanese but Google translate can, kinda. Google translate can help but doesn't always get the translation correct in what is to be conveyed. Having "read" other books on the subject of Temari, one learns how to read through the Japanese to pick out measurements and via the images you learn what they mean. What do the books cover? They "discuss" materials, tools, supplies, patterns, how to sew, etc. And in another blog post, I will walk you through one book's instructions and a single pattern so you will "learn" how to use them. BUT that post, which I think should best be tackled after you understand HOW to make a yubinuki; will then make understanding the books is easier. Here is a single picture of a simple pattern so you can understand what I am talking about regarding "reading a pattern in Japanese". 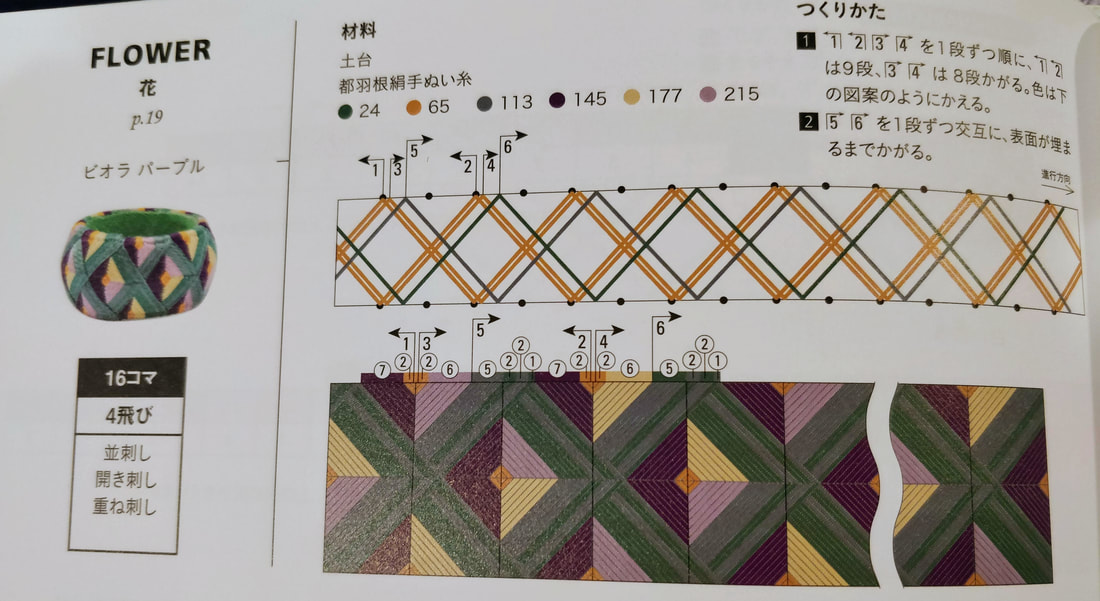 As I stated above, the books are written in Japanese and some are available via Amazon.JP or Esty re-sellers. (See list, pictures and notes below). Here is a list of books that I own and they are in the order of the book cover images below.
|
About LaurieLaurie lives in central Texas with Erich, a.k.a. "the shop elf", her hubby of 35+ years and Cowboy Boots, the cat; her metals studio including 100+ hammers and 300+ chasing tools; her sewing studio which has a sewing machine, a closet filled with fabric, hundreds of skeins of embroidery floss and perle cotton, silk and other materials, and Mrs. King the dress dummy; two weaving looms, assorted knitting needles, tubs of yarn; lots of books; plus a plethora of geeky tech gadgets, computers, and more. Archives
July 2024
Categories
All
|


 RSS Feed