kernology - where laurie and learning meet
  • Home
  • Blog
  • Pictures
    • Art & Craft >
      • Temari
      • Yubinuki
      • Quilting
      • Weaving
      • Lapidary Work
      • Metal Work 2010
      • Metal Work 2009
      • Classes - 2010
      • Classes - 2009
    • Boots
    • Views of Texas
    • Views of Scotland
    • Travel >
      • Bunny Bravehart Road Trips
      • Scotland 2012
      • Maine 2011
      • New Mexico 2010
      • Scotland 2008
  • Oh, the places you will go!
  • Contact Laurie

Yubinuki - Material Sources

7/29/2018

0 Comments

 
In the other post about materials, I wrote about what types and sizes of thread to use to make yubinuki. In this post I will tell you my sources for them.

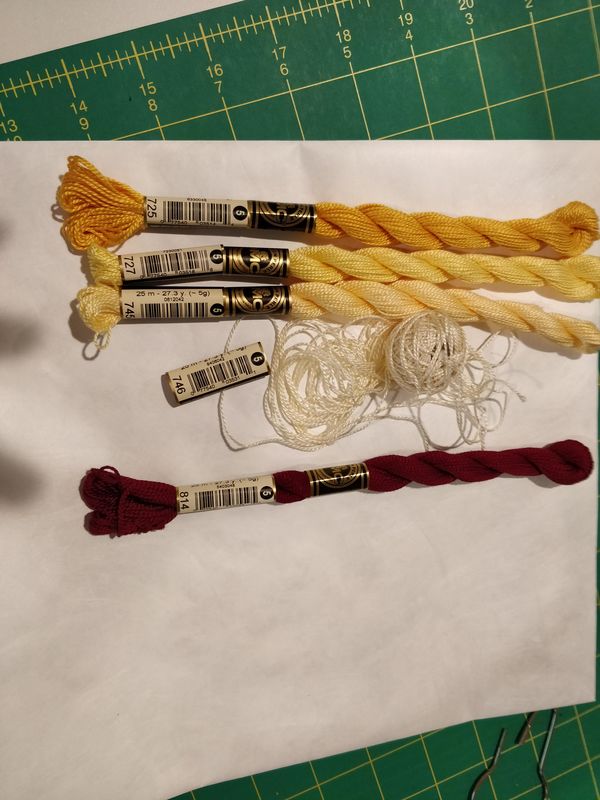
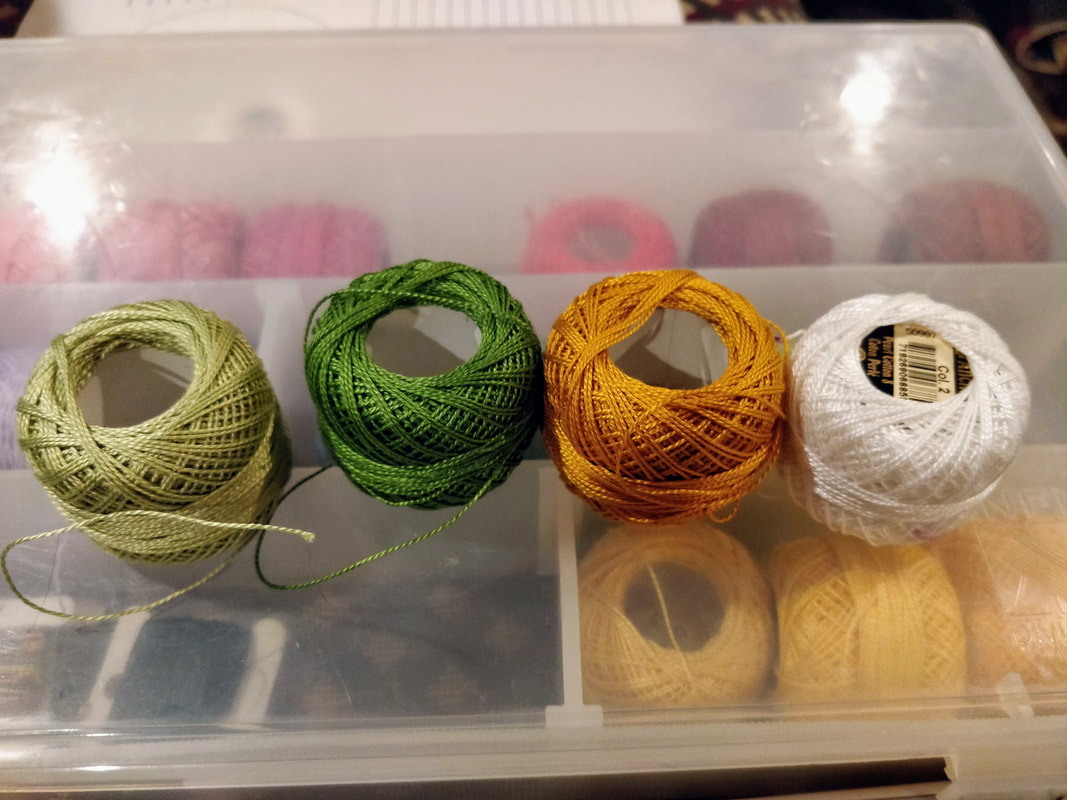
Threads are very particular to the user; I like cotton and silk and if I could I would use silk all the time. But I also have used polyester, poly/cotton, soy, linen, bamboo, and Tencel. Threads for making Yubinuki can be found almost anywhere provided you are willing to look and try them.  Having a background in sewing/weaving/knitting I go to Fiber Festivals around the area where I live and I look for threads and yarns that are lace weight, that could be used for making yubinuki; that is how I recently found the silk thread supplier (below) and silk lace weigh yarns. Go to knitting store as the fine threads for crochet (size 30 and 80) are also good to use.  Additionally go to needlepoint, embroidery, cross-stitch and other hand sewing stores who stock not only the big name manufacturers of threads but some of these smaller makers too. 

Then of course there is the web! You can search and find suppliers of threads from around the world, you just have to look and Google will be your friend! And do not rule out eBay, Etsy or Amazon as possible sources. It was via eBay that I picked up some silk floss and perle from Japan and I am still looking for online stores to source more from.

Now I am going to point you to some of the on-line vendors that I use for various threads. Yes; I now there are others but these are the places I like to use and none are local or big box stores.
  • 123 Stitch: They have flosses and perle cottons in many sizes and fibers.
  • Herrschners: Also a good selection of threads and you can sign up for their catalog.
  • ​Needlepoint Joint: They have tatting, bobbing lace, needlework, crochet, weaving, and knitting threads/yarns. 
  • Tatting Corner: A good selection of smaller diameter threads from various manufacturers around the world.
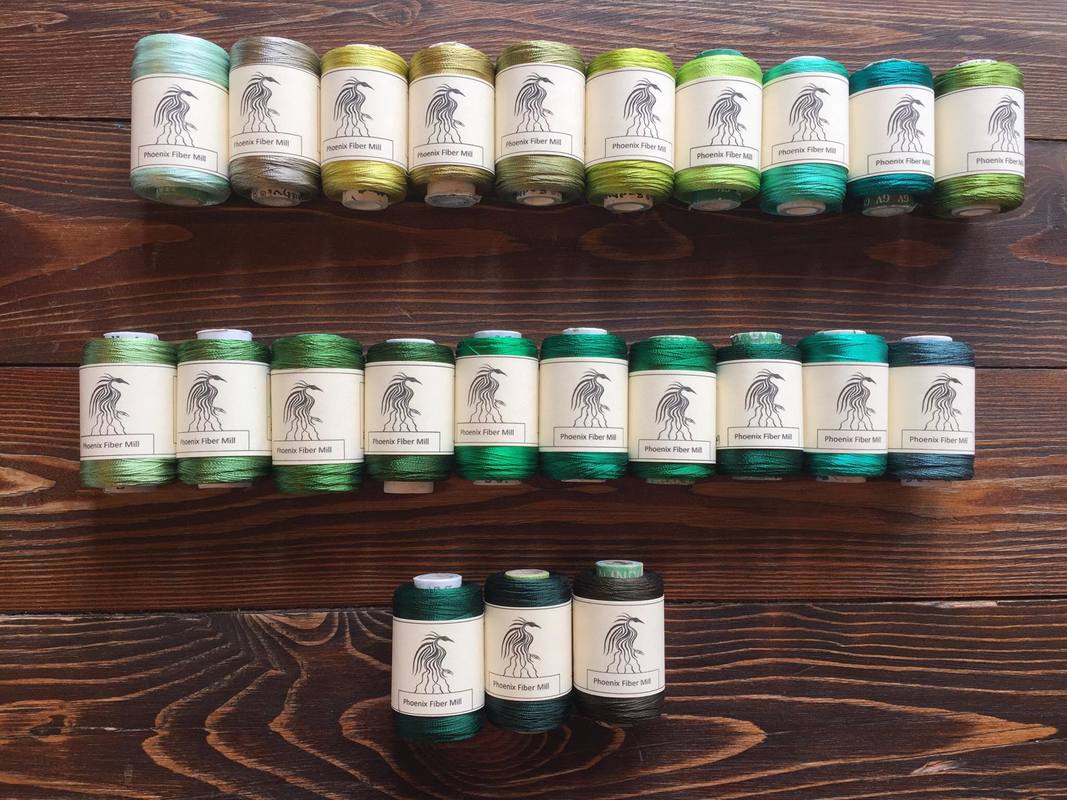
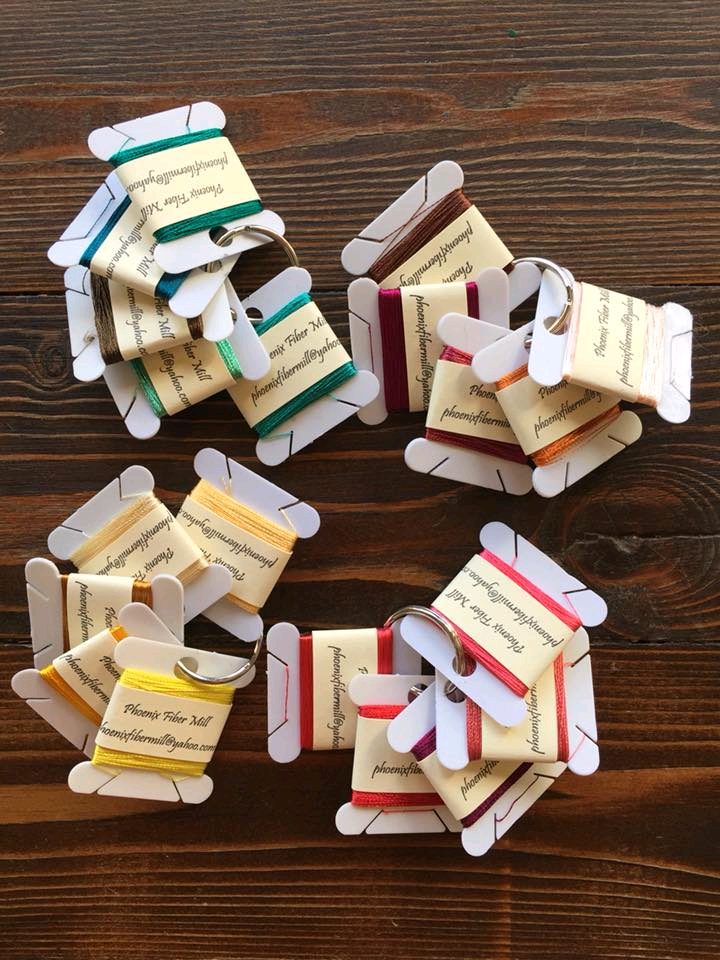
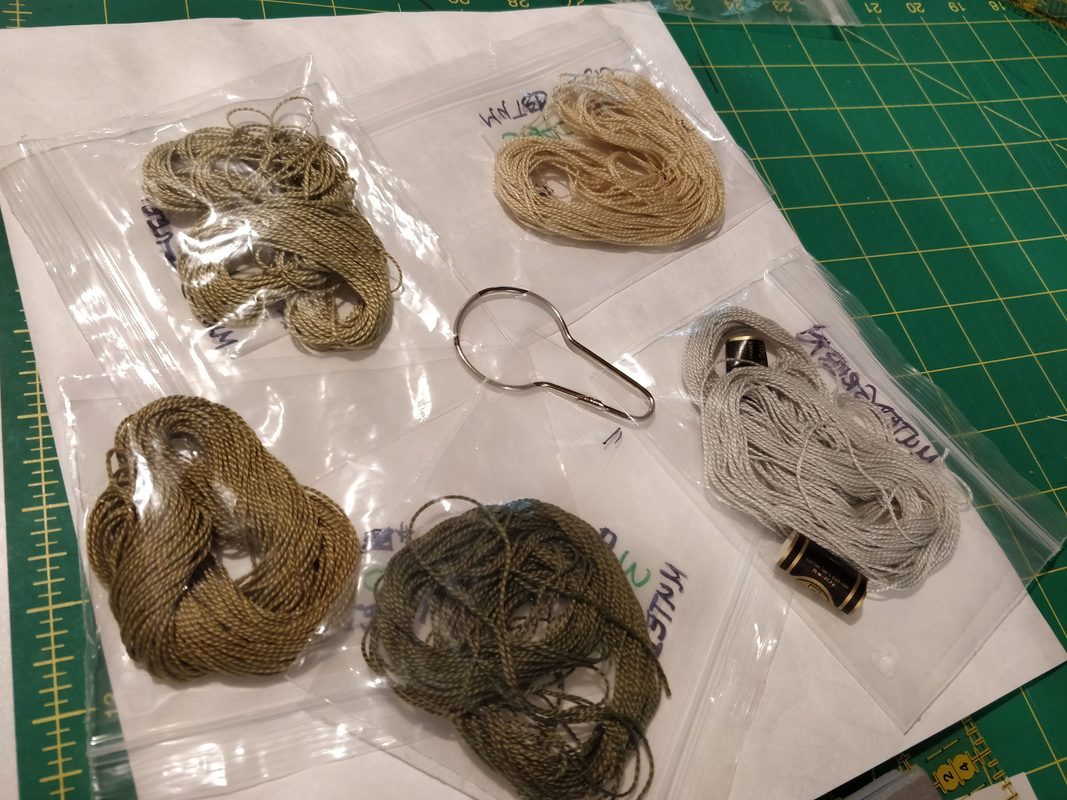
  • Phoenix Fiber Mill: I discovered their silk thread at a local fiber festival. The silk thread is NOT on their website but you can email them at phoenixfibermill@yahoo.com. They supply silk in spools of 23 grams each, which is  approximately 550 yards or an assortment of 5 bobbins with 40 yards on each bobbin equalling 200 yards total. I sent them pictures (from the DMC website) of the colors I was looking for, which they kinda matched and sent back pictures so I could confirm the colors. Each spool costs $10.00 and the 5 bobbin assortment costs $6.00.
Picture
Picture
0 Comments

Yubinuki - Materials

7/29/2018

0 Comments

 
In this post I discussed tools and supplies. Now let's talk materials for the yubinuki of which there is only ONE - THREAD. This is the primary material to make the design. There are several things to consider when selecting the thread for your yubinuki: color, material, and size. I don't think I need to discuss color at this point as that is important for your pattern, which shall be discussed in a later post. But the thread material and size are what be discussed in this post.

First some general information: Material and Size
Thread Material: In Japan, the traditional materials are either cotton or silk which was taken from the remnants of weaving. These are the two fibers still primarily used in modern times. Your skill level, design and personal preference will influence what material that is selected. There are also nice threads in linen, polyester, and blends and are also metal threads which is where a very fine wire is wrapped on a cotton or silk core; with some searching you can find silver, gold, and copper.

Thread Size:  Thread size is not actually measured in inches or millimeters; there are 3 major measuring system and each thread manufacturer picks how  measure their thread; trust me it is confusing and I learned quite a bit. What is important to know is that the thread size will influence how detailed the design of the pattern can be; the finer the thread the more details the pattern can have.   There are 3 ways to measure thread: Weight (meters per 1 gram), Tex/Length (grams per 1000 meters) or Denier ( weight in grams per 9000 meters).  Perle cotton is in the weight system and Japanese silk is sometimes given in denier and some I can't figure out at so let not worry about it at this point

​Let's now  let's look at some actual threads which can be used to make yubinuki.  The letters the start of each paragraph refers to the letters in the picture below. 

A) Cotton Perle Size 5: A 10 gram ball contains 45 meters.

B) Cotton Perle Size 8: A 10 gram ball contains 80 meters.

C)  Cotton Perle Size 12:  A 10 gram ball contains 120 meters.

D) Cotton Perle Size 16: On a 10 gram ball which contains 143 meters.

E) Tatting Cotton Weight 10: On a 25 gram spool which contains 112 meters.

F) Tatting Cotton Weight 20: On a 25 grams spool and contains 192 meters. 

G) Tatting Cotton Weight 40: On a 25 grams spool contains 274 meters.
 
H) Sewing Silk Perle: A spool contains about 17.5 yards or 16 meters and is about a cotton perle #12 in size. 

I) Silk Perle #16: Labeled as 1000 Denier, which is on a card and contains 20 meters. This is in between a perle size 12 and size 16 and is marked as 0.25 mm in diameter. 

J) Silk Perle #9: This is on a card and contains 80 meters.  This is finer than a perle size size 16, it could be a perle size 30 but I can't find much information on this size but it is finer than the 1000 denier.

K) Silk Thread: This is on a spool that weighs 23 grams and has 503 meters. There is also a 5 thread assortment, with each bobbin having 40 yards for a total of 200 yards.
​
It should be mentioned that there are other sized that have not been shown or other threads like cotton or silk floss's as well as various hand/machine sewing threads.  Remember as the "size" goes up, the thread diameter gets smaller; if a pattern uses a Perle Size 5 and you want to use Perle Size 8, you will have to take more stitches per division and that may require the overall pattern to be adjusted.

When making your first yubinuki, I suggest starting with a perle of size 5 or size 8 as you will have less stitches and a thicker thread is easier to work with. As experience grows, then move to using size 12 and 16 and eventually you will be using silk "sewing" thread.

I will discuss where to purchase these threads in the next post.
Picture
0 Comments

Temari Lesson 6

7/28/2018

 
Lesson 6 is about the herringbone stitch and this makes perfect sense. Each lesson so far has built upon the last; wrapping, squares, stars, spindles all with the same basic stitch but each adding an angle change. Along the way single layer, layered, and interlocked along with going from a simple 4 division up to 16 divisions. 

From this lesson I learned or improved:
1) My tension is more even
2) More accuracy in spacing each stitch so my points end at the same distance from the obi

Now that I completed lesson 6, I am half way through the course work for the Level 1 Basic (Honka) Certification and I am moving into new territory which is exciting.  

Temari Lessons Summer Break

7/28/2018

 
At the beginning of the month, I was about to start lesson 6 of my training for the  Level 1 Basic (Honka) Certification but instead I took a break to participate in a stitch-a-long.

What is a temari stitch-a-long? It is when a temari is made following the instructions, for the pattern, provided by the leader over several weeks.  In this case the pattern was from a Temari book that is from Japan, and in Japanese, which our leader was able interpret into English.  The first instruction was about making the mari - what size so the design would fit and how to select colors for the design. The second instruction set, and the second week, was how to mark the mari for the design and adding the obi. The third instruction set told us how to wind the major portion of the design, as this was not stitched temari but a wound one. We had two weeks to finish this part since the amount of winding and layers was quite a bit. The last and final instructions were about finishing the the Temari.

When I saw the images of the temari for the stitch-a-long, I knew I wanted to do it and so I made TWO mari and selected two different color themes.  I had to start them both over since I was winding the the wrong direction and then when I was almost done with the second temari I found 2 bad mistakes - the layering was wrong and missed sections, I undid ALL the wrapping to start over.  That alone took an entire Saturday. 

Here are my process pictures, all 25 of them hope you enjoy seeing them being made.

Yubinuki - Tools And Supplies

7/15/2018

2 Comments

 
Before you can make a yubinuki, one must have some tools and supplies. I will cover the materials for making a yubinuki in another post. I use the term supplies as those items that are used again and again to make a yubinuki where as materials are those items required to make a specific yubinuki, yet they can be generally detailed.

Here is a list and a description of what/why you need them. Again, this is a list based upon what I have found to be readily available here in the USA. 

NOTE: All of these will make sense as you work through the various tutorials.

Tools:
  • Small Scissors with a fine point - this is for cutting threads especially when working on a yubinuki
  • Measuring Tape, flexible, with millimeter markings - for measuring a finger, to determine the inside diameter of the yubinuki.
  • Metal Ruler or Plastic Cutting Ruler - 6" or more in length for cutting paper and the cloth lining for the yubinuki core.
  • Large Scissors or Rotary Cutter - for cutting paper and the cloth lining for the core.
  • Cutting Mat - if you use a rotary cutter.
  • Embroidery Needles in various sizes. Depending on the thread size you are sewing with the eye of the needle will have to be large enough to accommodate that thread. Get a pack of these since having a sharp needle is important.
  • Threader - So you can easily thread your needle. Some threads are very small in diameter and this will make your life easier.
  • Pins - preferably "silk" pins as they are sharper and smaller than LARGE glass head pins.
  • Pin Cushion - for holding needles and pins.
  • Magnet - this is optional but I use it for finding pins that have been dropped on me or the floor.
  • Calculator - for doing some math. This is optional, I will show in a tutorial how to make a master division sheet so you don't have to do math.

Supplies:
  • Fine Tip Marking Pen - For marking the divisions of your pattern, on the core. I use a permanent ink.
  • Card Stock or Heavy Paper - This is the foundation of the core, this will be discussed in detail in the core tutorial
  • Tyvek, Plain Paper or Interfacing - For marking the pattern divisions and it should be thin! I like tyvek as it holds up better. Again this will be covered in the core tutorial.
  • Regular Sewing Thread - This is to sew part of the core and 100% cotton is the best! Color is not as important but you may want it to match the lining of the core.
  • Padding/Wadding - this is used to pad the yubinuki. This can be cotton from a cotton ball or cotton embroidery thread or wool or silk "top" used for spinning (this is raw fiber). 
  • Double and/or Single Sided Adhesive Tape - used for securing various parts of the core during assembly.
  • Bias Cut Cloth - this is for the inside surface of the yubinuki which is what is against the skin of the finger. It also is what covers the core.  

The pictures below will help you visualize some of the tools you will need. Next time I will discuss the materials  that are used to actually make a yubinuki.  
2 Comments

Yukinubi Books

7/7/2018

1 Comment

 
Speaking of books from Japan... There are currently 6 pattern books available with 2 of them combined with Temari patterns. There are some books that are pictures from exhibitions but I have not bought them yet. These are good to have, eventually because once you become adept at reading patterns and making yubinuki, just a pictures can guide you on figuring out the sewing pattern.

​So how does one use the Japanese books?? And, NO I can't read Japanese but Google translate can, kinda. Google translate can help but doesn't always get the translation correct in what is to be conveyed.  Having "read" other books on the subject of Temari, one learns how to read through the Japanese to pick out measurements and via the images you learn what they mean.

What do the books cover? They "discuss" materials, tools, supplies, patterns, how to sew, etc.  And in another blog post, I will walk you through one book's instructions and a single pattern so you will "learn" how to use them. BUT that post, which I think should best be tackled after you understand HOW to make a yubinuki; will then make understanding the books is easier.   Here is a single picture of a simple pattern so you can understand what I am talking about regarding "reading a pattern in Japanese".
Picture


As I stated above, the books are written in Japanese and some are available via Amazon.JP or Esty re-sellers. (See list, pictures and notes below). 

​​Here is a list of books that I own and they are in the order of the book cover images below.
  • ISBN: 978-4537214512
    Title: Yuzuki 's lovable Kaga - Combine threads to any number of favorites (English Translation) 
    Note: Written in Japanese and available via Amazon.JP
  • ISBN: 978-4416314081 
    Title: First time Kaga Yuuki: A beautiful pattern born from a single thread (English Translation) 
    Note: Written in Japanese and available via Amazon.com
  • ISBN: 978-4837703082 
    Title: Kaga's Thimble and Flower Tempo Book Takeshi (English Translation) 
    Note: This is also a Temari book. Written in Japanese and available via Amazon.com
  • ISBN: 978-4579114863 
    Title: Kaga's Yubinuki Tanki for the Four Seasons (English Translation) 
    Note: Written in Japanese and available via Amazon.com
  • ISBN: 978-4140311400 
    Title: Thimble of Kaga that darn with silk thread (English Translation) 
    Note: Written in Japanese and available via Amazon.com
  • ISBN: 978-4837701149
    Title: Continuation - Kaga's Thimuki and Flower Temari-no-Kaga's Thimuki and Flower Temari-no-Tze <2nd Collection> (English Translation) 
    Note: Written in Japanese, this is mostly a Temari book and I have only found it on Amazon.JP

1 Comment

Yubinuki Rewind

7/7/2018

0 Comments

 
If you read my prior post about yubinuki, I gave some basic information and two links to some more information on them. In 2 groups I belong to (a FB group and a private list server for Temari), there was great interest so i have decided to back up and begin an more orderly coverage of the topic. 

It will take many posts but what I hope to accomplish is not only to master my own skills for making Yubinuki but to provide information on making them including:
  • tools and other supplies
  • materials
  • how to sew a yukinubi
  • reading patterns
  • designing patterns
  • books
PLUS what to what I find works and does not. FYI, I started my career as a manufacturing engineer determining how to and then writing the documents for the production and assembly of medical equipment. So I think I have this in terms of explaining it.

My next post will be on tools and supplies.

​See you soon.

0 Comments

Yubinuki - Another Rabbit Hole

7/5/2018

0 Comments

 
Yubinuki is another Japanese textile art form I have just learned and I have been fascinated with for a while.  Last month, I fell down the rabbit hole and bought books from Japan, some supplies based upon what I had read and seen online and started to learn about how to make them since I find the designs wonderful and the technique can also be applied to the obi of a temari.

So what is Yubinuki? 
The word translates to thimble ring.

What does that mean?
In most western countries, a thimble is either metal or leather and it is worn on the end of a finger and it is used to push the sewing needle through the item being sewn. In Japan, they wear the thimble ring, worn usually on the middle finger, just above the knuckle, to push the needle. 

Plus, as with common with traditional crafts in Japan, this has grown into an art form; people wear them as rings or just make and collect them for the colors and designs. 

To be honest, I am not going to go into the details of the history of them as there are lots of posts out on the web about it so I am providing a link to one that has a good explanation. This is a link to a website that is a bit old, but it is in English and there are several posts on how to make a core and more; just reading all the blog posts is very informative.

What you will see in this and future posts are yubinuki that I make including in-process photos and my thoughts on the materials I find and use to make them.

Here are images of my first three. I made the first one using a card stock core, bias tape, interfacing, 6 strand cotton floss for the wadding and 3 strands of cotton floss for the stitching. Since making that first one another temari artist has been giving me advice on how to make them and what types of threads to use. After trading many emails, I made the purple one and then the white/green/brown one. 

The third one is based upon a design that was in one of the books from Japan. That design had 24 stitches (and rounds) of the white in the first division. Not having the silk thread that is also thinner than the size 8 perle cotton I was using, I decided to do the math! I found it only took 12 stitches in the perle to fill the division on the core I had made thus I would only need 2 stitches for each of the other bands where the pattern had indicated 4; and it worked out perfectly!

Have fun looking at the pictures below, and watch out for this rabbit hole!
0 Comments

Temari Lesson 5

7/1/2018

 
I have completed Lesson 5 which is spindles, the almond shaped stitching you see on the temari below.
I am now seeing the method to lesson plans, as learning to stitch even squares and stars is a lead in to spindles. For all three of these shapes, if your tension is too tight the stitches will pop up and onto the inner threads that were previously laid down and and with spindles it is even more apparent. You can really see this in the third temari; I was not having a good week at work and I transferring my mood to the temari.

The other part of this lesson dealt with layering the threads which is not interweaving which you can see on the 1st and 4th temari. Layering is done, most of the time, with a separate needle and thread for each color being layered. So for the 3rd and 5th temari I was working with 2 needles and for the 6th I was working with 3 needles

The last 3 temari are of course the bonus rounds I did for extra practice and the last one combines Squares and Spindles.

What I learned in this lesson:
1) Keep measuring your spindle point distance from the obi, to make sure they are the same length
2) Don't pull the threads too tight or your excess tension will cause the threads to bunch up and not lay flat
3) Be one with the Temari!

Over the next few days I will be working on a temari for a stitch along from the Temari Kai community I belong to. The temari is a wrapped and interweave pattern from a Japanese pattern book I do not have making it a fun challenge.

    RSS Feed

    About Laurie

    Laurie lives in central Texas with Erich, a.k.a. "the shop elf", her hubby of 35+ years and Cowboy Boots, the cat; her metals studio including 100+ hammers and 300+ chasing tools; her sewing studio which has a sewing machine, a closet filled with fabric, hundreds of skeins of embroidery floss and perle cotton, silk and other materials, and Mrs. King the dress dummy; two weaving looms, assorted knitting needles, tubs of yarn; lots of books; plus a plethora of geeky tech gadgets, computers, and more.

    Archives

    March 2023
    February 2023
    January 2023
    December 2022
    November 2022
    October 2022
    September 2022
    August 2022
    July 2022
    June 2022
    May 2022
    April 2022
    March 2022
    February 2022
    January 2022
    December 2021
    November 2021
    October 2021
    September 2021
    August 2021
    June 2021
    May 2021
    April 2021
    March 2021
    February 2021
    January 2021
    December 2020
    November 2020
    October 2020
    September 2020
    August 2020
    July 2020
    June 2020
    May 2020
    April 2020
    March 2020
    February 2020
    January 2020
    December 2019
    November 2019
    September 2019
    June 2019
    May 2019
    April 2019
    March 2019
    February 2019
    November 2018
    October 2018
    September 2018
    August 2018
    July 2018
    June 2018
    May 2018
    April 2018
    March 2018
    November 2017
    October 2017
    September 2017
    August 2017
    June 2017
    May 2017
    April 2017
    March 2017
    February 2017
    October 2016
    September 2016
    August 2016
    June 2016
    May 2016
    April 2016
    February 2016
    January 2016
    November 2015
    October 2015
    September 2015
    August 2015
    July 2015
    June 2015
    May 2015
    April 2015
    March 2015
    February 2015
    January 2015
    December 2014
    October 2014
    September 2014
    August 2014
    July 2014
    June 2014
    May 2014
    April 2014
    March 2014
    February 2014
    January 2014
    December 2013
    November 2013
    October 2013
    September 2013
    August 2013
    July 2013
    June 2013
    May 2013
    April 2013
    March 2013
    February 2013
    January 2013
    December 2012
    November 2012
    October 2012
    September 2012
    August 2012
    July 2012
    June 2012
    May 2012
    April 2012
    March 2012
    February 2012
    January 2012
    December 2011
    November 2011
    October 2011
    September 2011
    August 2011
    July 2011
    June 2011
    May 2011
    April 2011
    March 2011
    January 2011
    December 2010
    November 2010
    August 2010
    July 2010
    June 2010
    May 2010
    April 2010
    March 2010
    February 2010
    January 2010
    December 2009
    August 2009

    Categories

    All
    42
    Android
    Boots
    Bunny Bravehart
    Codesmith
    Comic-Con
    Covid
    Day Job
    Family
    Fencing
    Fiber
    Health
    Hike
    Jewelry
    Knitting
    Laurie
    Metals
    Minecraft
    Pandemic
    Photography
    Quilting
    Retirement
    Road Trip
    Scotland
    Sources
    Spinning
    Temari
    Texas
    The Big Walk
    Weaving
    Web
    Yubinuki

Powered by Create your own unique website with customizable templates.